Stuffed Cookies Filled with Biscoff and White Chocolate
This stuffed cookies recipe filled with Biscoff and white chocolate might just ruin all other cookies for you… in the best possible way.
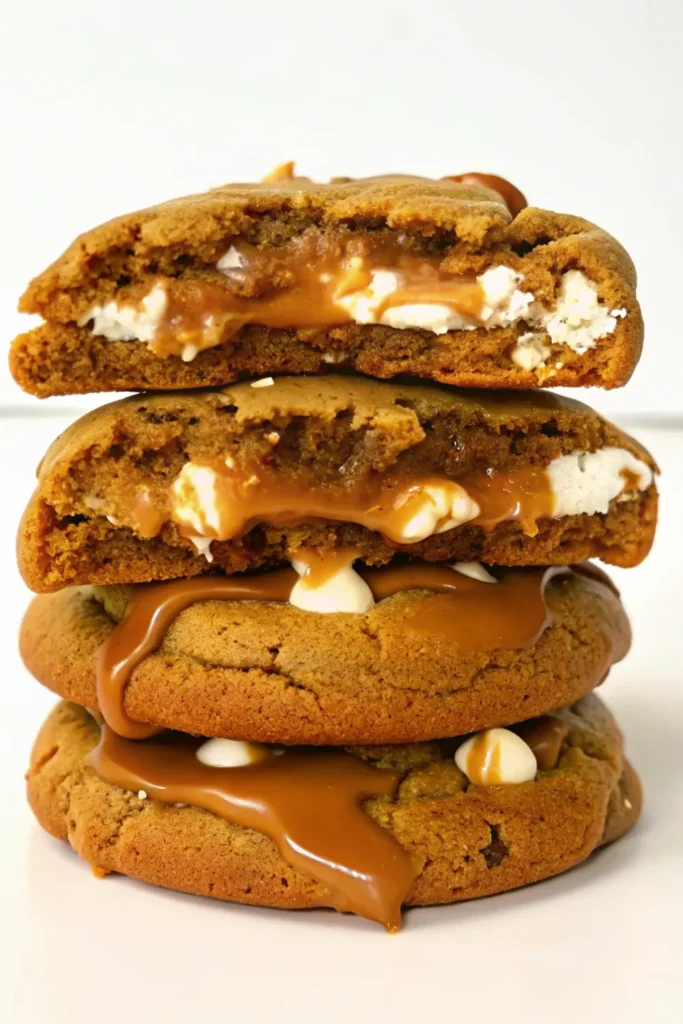
Have you ever taken a bite of a cookie so rich and gooey that you had to pause mid-chew just to appreciate what’s happening in your mouth? That was me, standing in the kitchen, holding a still-warm cookie with molten Biscoff oozing out of the center. I had one of those “oh no, I’ve peaked” moments. And I meant it. These cookies are that good.
I’ve been baking for years, and I’ve made everything from triple chocolate chunk to delicate shortbread. But these? These were a happy accident turned obsession. I was inspired by those giant bakery-style cookies everyone’s raving about (yes, including that Butter Boy recipe), but I wanted to pack them with Biscoff flavor. Not just in the filling but in the dough itself. So I played around, made some tweaks, browned some butter (because of course), and what came out of the oven was a borderline spiritual experience.
You don’t need fancy equipment, and you definitely don’t need to wait overnight like some other cookie recipes out there. Just a little patience while the dough chills and boom, you’ve got bakery-worthy cookies that are crispy on the outside, soft and chewy on the inside, and filled with warm, spiced Biscoff and creamy white chocolate.
Honestly? You’re not ready. But you should be.

WHY YOU WILL LOVE THIS RECIPE
- That gooey Biscoff center. It’s not just mixed in the dough, it’s hidden right in the middle of each cookie. So when you bite in? Boom, warm Biscoff comes oozing out like a surprise you didn’t know you needed.
- Brown butter brings the magic. Browning the butter gives these cookies a deeper, nuttier flavor that takes the whole thing up a notch. It’s one of those steps that feels extra, but trust me, it’s worth every minute.
- Crispy edges, chewy middles. I tested this recipe more times than I care to admit just to get that texture balance right. You get a slight crunch around the outside, but the center stays soft and dense — exactly how a cookie should be.
- No overnight wait required. Yeah, you can chill the dough for 12 to 24 hours for maximum flavor, but even a quick 2-hour chill gets you killer results. You don’t have to plan your life around these cookies.
- They taste like fall, all year round. The spices in the dough — cinnamon, allspice, ginger — give that cozy, warming flavor that just screams fall. But let’s be honest, I’d eat these in the middle of summer too.
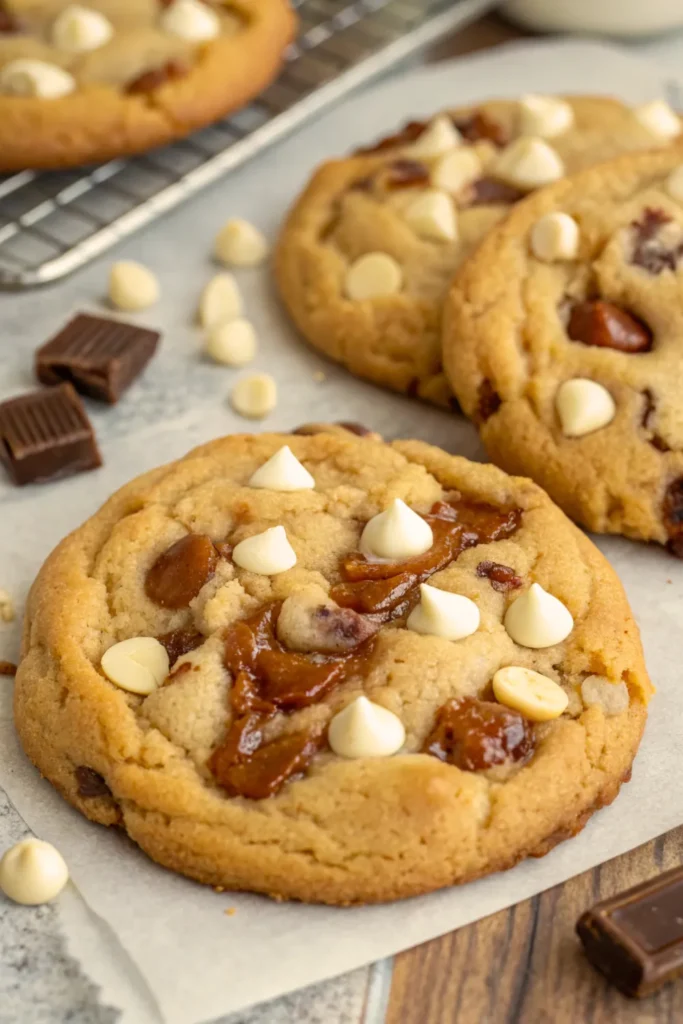
- Big, bakery-style cookies. These aren’t your average little homemade cookies. They’re thick, oversized, and totally worthy of a bakery window display… if you don’t eat them all first.
INGREDIENTS FOR STUFFED COOKIES
Biscoff center
- 280g (9.5 oz) Biscoff spread, smooth (8 heaped tablespoons, about 35g each)
Butter
- 225g (2 sticks) unsalted butter, cut into 1cm (1/2 inch) cubes
Dry ingredients
- 2 1/4 cups all-purpose flour, spooned and leveled
- 3 teaspoons cornstarch, packed tightly and leveled
- 1/4 teaspoon baking powder
- 1/2 teaspoon baking soda, sifted if lumpy
- 1/2 teaspoon kosher salt (use 1/4 tsp if using table salt)
Spices
- 1 teaspoon cinnamon
- 1/2 teaspoon allspice (or mixed spice)
- 1/4 teaspoon ground ginger
Sugars
- 3/4 cup packed light brown sugar
- 1/3 cup caster sugar (or granulated sugar)
Wet ingredients
- 1 large egg, room temperature
- 1 large egg yolk, room temperature
- 1 teaspoon alcohol-free vanilla extract or vanilla powder
Chocolate
- 1 1/4 cups white chocolate chips, plus extra for topping
STEP BY STEP INSTRUCTIONS
- STEP 1). Scoop 8 heaping tablespoons of Biscoff spread onto a lined tray, flatten slightly, and freeze for at least 1 hour until firm.
- STEP 2). Melt the butter in a saucepan over medium-high heat, simmer for 4 to 5 minutes until foamy with golden specks, then pour into a heatproof bowl and cool for about 45 minutes.
- STEP 3). In a separate bowl, whisk together the flour, cornstarch, baking powder, baking soda, salt, cinnamon, allspice, and ginger.
- STEP 4). Stir the brown sugar and caster sugar into the cooled butter, then mix in the egg, egg yolk, and vanilla until the mixture is smooth and shiny.
- STEP 5). Add the dry ingredients and mix until just combined, then fold in the white chocolate chips.
- STEP 6). Divide the dough into 8 equal portions (about 125g each), flatten each one, place a frozen Biscoff disc in the center, and wrap the dough around it to fully seal.
- STEP 7). Chill the filled dough balls in the fridge for at least 2 hours, or up to 24 for best flavor and texture.
- STEP 8). Preheat the oven to 350°F (180°C) and line two baking trays with parchment paper, placing 4 cold dough balls on each tray with plenty of space between.
- STEP 9). Bake for 18 to 19 minutes until the edges are golden and the tops look just set, then immediately press extra chocolate chips into the tops if desired.
- STEP 10). Let the cookies cool on the tray for 20 minutes so they finish setting before digging in.
EXPERT COOKING TIPS FOR STUFFED COOKIES FILLED WITH BISCOFF AND WHITE CHOCOLATE
- Don’t skip the butter browning. It’s not just for flavor, it changes the texture too. Brown butter adds this deep, nutty note that makes the cookies taste more complex, almost like you added something fancy when you didn’t.
- Make sure the Biscoff centers are frozen solid. If they’re soft when you stuff the dough, they’ll melt too fast and ooze out during baking. Trust me, I lost a few good cookies that way in testing.
- Scoop evenly for bakery-style results. I use a scale to portion out about 125g of dough for each cookie. It helps them bake evenly and makes sure every one comes out thick and gorgeous.
- Chill that dough, even just a little. I know you might be tempted to skip the fridge, but even 2 hours of chilling makes the texture so much better. If you’ve got the time, overnight is magic.
- Shape them tall, not flat. Roll the dough into tall domes instead of flat disks. This helps them puff up in the oven and keeps that center nice and gooey.
RECIPE FAQ
Do I have to brown the butter?
Technically, no. But honestly? Browning the butter gives these cookies so much more flavor. If you’re short on time, you can skip it... but I wouldn’t.
Can I make these smaller?
Yep, just use less dough and a smaller Biscoff center. They won’t have the same big bakery vibe, but they’ll still taste amazing. Bake time will be a bit shorter, so keep an eye on them.
What’s the best way to store them?
I keep mine in an airtight container at room temp for up to 4 days. They stay soft in the middle and the edges hold their crisp. You can also freeze the unbaked dough balls and bake them straight from the freezer.
TROUBLESHOOTING COMMON COOKIE ISSUES
- My cookies spread too much. This usually means the dough wasn’t chilled long enough or your butter was still too warm when you mixed it. Let the browned butter cool fully before adding sugar, and chill the dough at least 2 hours.
- The Biscoff leaked out during baking. Been there. That happens when the Biscoff center wasn’t fully frozen or the dough wasn’t sealed tight around it. Press those seams closed and double check the filling is solid before wrapping.
- They look underbaked in the middle. That’s actually perfect. These cookies should be just barely set in the center when you pull them out. They finish cooking as they cool on the tray.
- My cookies are puffier than yours. Could be your flour was a bit too packed, or maybe your oven runs a little cooler. Use a scale for measuring if you can, and don’t be afraid to gently press the cookies into shape right after baking.
MAKE-AHEAD AND STORAGE TIPS
- Make the dough in advance. You can prep the cookie dough (with the Biscoff centers inside) up to 48 hours ahead. Just keep the dough balls in an airtight container in the fridge until you’re ready to bake.
- Freeze for later. These freeze like a dream. After chilling in the fridge for 12 hours, transfer the dough balls to a freezer-safe bag and stash them away. Bake straight from frozen, just add 3 to 4 minutes to the usual bake time.
- Store baked cookies properly. Once baked and cooled, keep the cookies in a sealed container at room temp. They’re best the first 3 days but still soft and chewy up to day 5 or 6. That’s assuming they last that long.
- Reheat for that gooey center. Pop a cookie in the microwave for about 10 seconds to bring that Biscoff center back to life. It’s not exactly like fresh-baked, but it’s pretty dang close.
There’s something wildly satisfying about pulling a tray of these stuffed cookies out of the oven and seeing that golden edge with just a hint of melted Biscoff peeking through. They’re cozy, they’re indulgent, and they somehow feel like both a celebration and a comfort food at the same time.
If you try them — and I really hope you do — don’t forget to save one for yourself before they vanish. Just speaking from experience here.

Stuffed Cookies Filled with Biscoff and White Chocolate
Ingredients
Biscoff center
- 280g (9.5 oz) Biscoff spread, smooth (8 heaped tablespoons, about 35g each)
Butter
- 225g (2 sticks) unsalted butter, cut into 1cm (1/2 inch) cubes
Dry ingredients
- 2 1/4 cups all-purpose flour, spooned and leveled
- 3 teaspoons cornstarch, packed tightly and leveled
- 1/4 teaspoon baking powder
- 1/2 teaspoon baking soda, sifted if lumpy
- 1/2 teaspoon kosher salt (use 1/4 tsp if using table salt)
Spices
- 1 teaspoon cinnamon
- 1/2 teaspoon allspice (or mixed spice)
- 1/4 teaspoon ground ginger
Sugars
- 3/4 cup packed light brown sugar
- 1/3 cup caster sugar (or granulated sugar)
Wet ingredients
- 1 large egg, room temperature
- 1 large egg yolk, room temperature
- 1 teaspoon alcohol-free vanilla extract or vanilla powder
Chocolate
- 1 1/4 cups white chocolate chips, plus extra for topping


