Simple Halloween Cupcakes You Can Make in Minutes
This simple Halloween cupcakes recipe is the kind of thing that saves the day when you want to make something festive but don’t have hours to spare. I can’t tell you how many times I’ve been running around before a Halloween party thinking, “Why did I sign up to bring dessert?” That’s when I pull out this little lifesaver of a recipe.
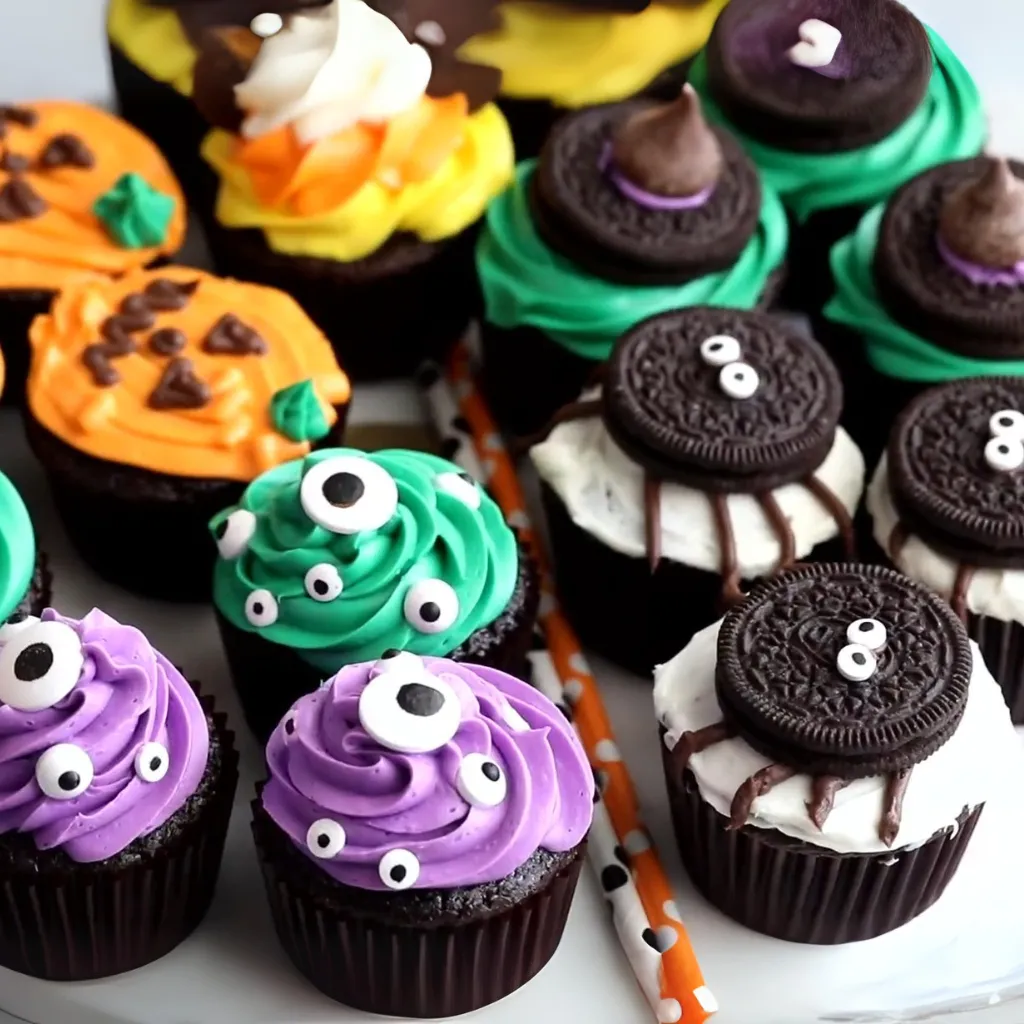
These cupcakes aren’t just quick, they’re also insanely fun to make. I mean, when else do you get to turn cookies into spider bodies or swirl frosting into little pumpkin faces? My kids always jump in at this part, which makes the kitchen a happy mess, but honestly, I wouldn’t trade it. The best part is that you don’t need fancy tools or professional decorating skills. Just a few basic supplies and some colorful frosting, and you’ve got a tray of spooky, cute, or downright silly cupcakes ready to share.
So if you’ve been scrolling and stressing about what treat to make this Halloween, let me stop you right here. These cupcakes check all the boxes: fast, easy, festive, and a total crowd-pleaser. Let’s just say, they’ve saved my reputation more than once.
WHY YOU WILL LOVE THIS RECIPE
- Fast and easy to make – You only need a batch of cupcakes, some frosting, and a few simple decorations to create something festive. The decorating is quick, which makes these perfect for busy weeknights or last-minute Halloween parties.
- Kid-friendly decorating – Children love helping with these cupcakes. From sticking on candy eyes to swirling colorful frosting, every step is simple enough for little hands to join in the fun.
- Versatile designs – You can choose from spiders, witches, pumpkins, monsters, or even Mickey-themed cupcakes. This variety makes them exciting for gatherings since everyone can pick their favorite design.
- Budget-friendly ingredients – Most of the decorations come from everyday grocery store items like cookies, candy, and food coloring. There is no need to spend extra on specialty supplies to make them look impressive.
- Perfect party treat – These cupcakes are bite-sized, easy to transport, and guaranteed to be a hit at school parties, potlucks, or family celebrations. They also look great displayed on a dessert table.
INGREDIENTS FOR SIMPLE HALLOWEEN CUPCAKES
Base cupcakes
- 24 baked and cooled chocolate cupcakes
Frosting
- 2 ½ cans vanilla or buttercream frosting (about 5 cups total), divided
- ½ can chocolate frosting
Decorations for spider cupcakes
- ½ can chocolate frosting
- 12 chocolate sandwich cookies
- 24 small candy eyes
Decorations for witch cupcakes
- Green gel food coloring
- Purple gel food coloring
- 12 chocolate sandwich cookies
- 12 plain chocolate drops or milk chocolate cones
Decorations for pumpkin cupcakes
Decorations for monster cupcakes
Decorations for Mickey cupcakes
STEP BY STEP INSTRUCTIONS
- STEP 1). Bake your chocolate cupcakes ahead of time, let them cool completely, and set out your frosting, food coloring, and decorations so everything is ready to go.
- STEP 2). For the spider cupcakes, spread white frosting on each cupcake, pipe four chocolate legs on each side with a #5 tip, press a cookie in the center, then add two small dots of frosting on top of the cookie and place candy eyes.
- STEP 3). For the witch cupcakes, tint about 2 cups of frosting green, pipe a flat swirl with a 1M tip, place a cookie in the center, add a small dollop of purple frosting, and finish with a chocolate drop on top to look like a witch’s hat.
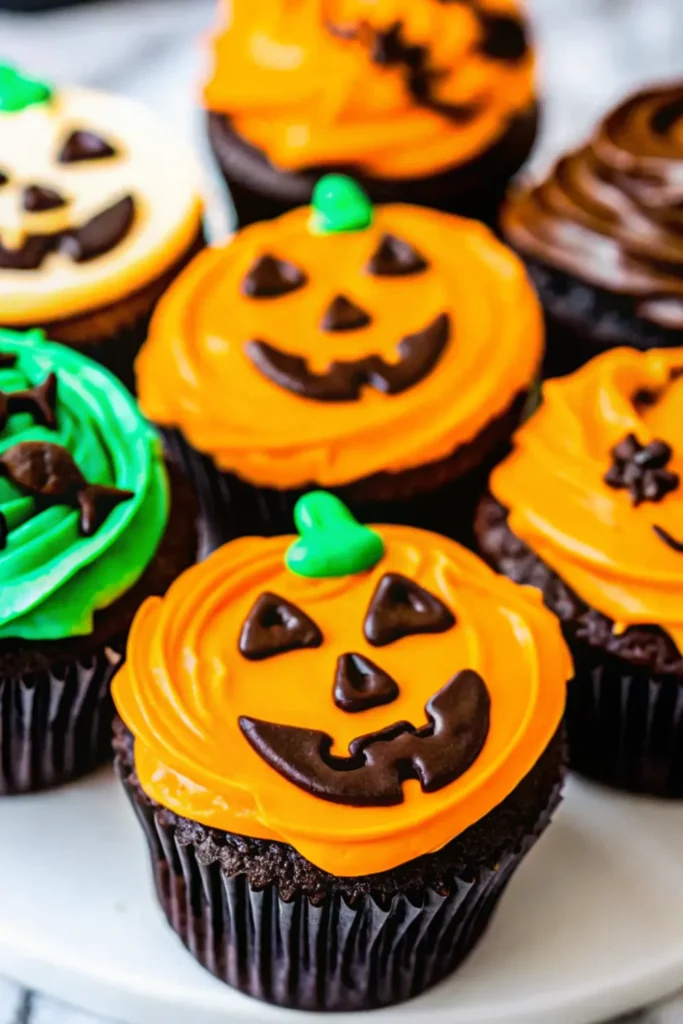
- STEP 4). For the pumpkin cupcakes, tint about 2 cups of frosting orange, pipe stripes using a #47 tip with the flat side up, use chocolate frosting with a #5 tip to draw the face, and add green frosting for the stem.
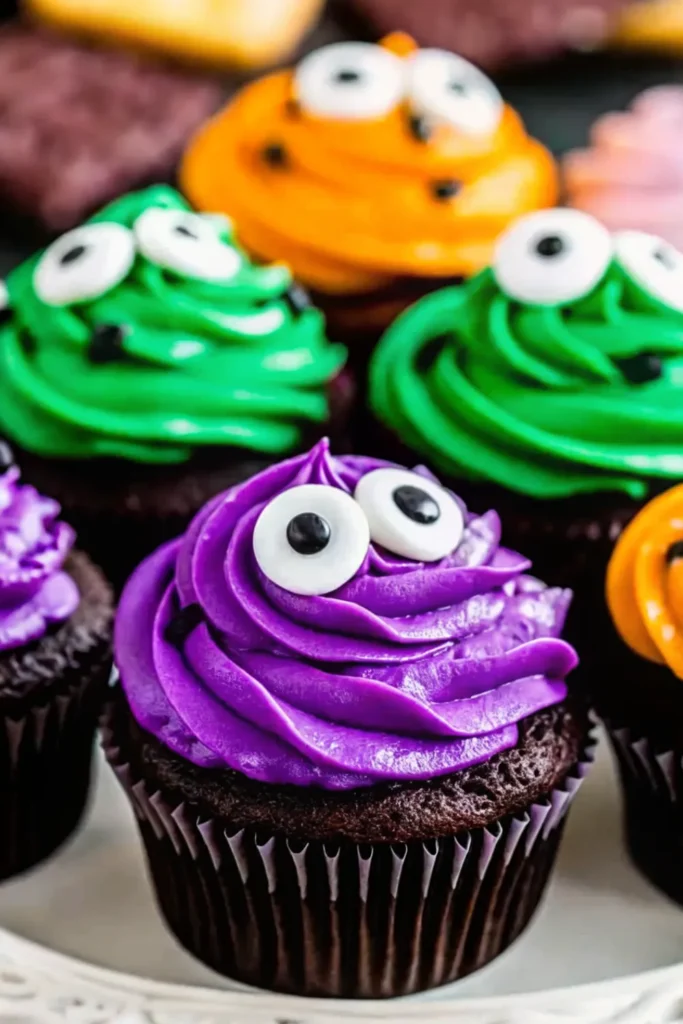
- STEP 5). For the monster cupcakes, divide frosting into purple and green, pipe swirls with a 1M tip, and press candy eyes randomly over the top.
- STEP 6). For the Mickey cupcakes, split frosting into three parts and tint one yellow, one orange, and leave one plain, pipe a flat swirl of yellow frosting and chill 10 minutes, repeat with orange, chill again, then finish with white frosting on top, and press two chocolate discs or mini cookies into the sides for ears.
- STEP 7). Store the decorated cupcakes in the refrigerator for up to 3 days, keeping them covered so the frosting stays fresh.
EXPERT COOKING TIPS FOR SIMPLE HALLOWEEN CUPCAKES
- Work with chilled cupcakes. If the cupcakes are even slightly warm, the frosting will slide right off. I like to pop mine in the fridge for 10–15 minutes before decorating.
- Gel coloring beats liquid. Gel food coloring gives you those bold Halloween colors without thinning the frosting. A little goes a long way, so start small and build up.
- Pipe, then pause. For designs like the Mickey or pumpkin cupcakes, chilling the frosting between colors keeps the layers neat and prevents them from blending together.
- Don’t overthink it. The monster cupcakes look best when they’re a little messy and goofy. Just throw on some swirls of frosting, add candy eyes at random, and call it done.
- Batch your decorating. Instead of finishing one cupcake design completely before moving on, I find it faster to do each step across all 24 cupcakes. Frost them all, then add cookies, then eyes, and so on—it saves time and feels less chaotic.
RECIPE FAQ
How far in advance can I make these cupcakes?
You can bake the cupcakes a day or two ahead and store them in an airtight container. I recommend decorating them the same day you plan to serve for the freshest look and taste.
What if I don’t have piping tips?
No stress. You can snip the corner off a plastic bag and still pipe legs, swirls, or stripes. The shapes might be less precise, but they’ll still look fun and festive.
Can I freeze the decorated cupcakes?
I don’t recommend freezing once they’re decorated, since the colors and candies don’t always thaw nicely. If you want to plan ahead, freeze the plain cupcakes and frost them later.
HOW TO STORE AND MAKE AHEAD
One of the best parts about these cupcakes is that you can do a little prep work ahead of time and save yourself some last-minute chaos. I’ve learned that if I spread things out, I actually enjoy the decorating instead of rushing through it.
If you want to make them in advance, bake the cupcakes up to two days before and store them in an airtight container at room temperature. For longer storage, you can freeze the plain cupcakes for up to two months, just be sure they’re tightly wrapped so they don’t dry out. When you’re ready, let them thaw at room temperature before frosting.
As for the frosting, you can color it the day before and keep it covered in the fridge. Just remember to pull it out about 30 minutes before decorating so it softens up again. And one last tip, don’t add the candy eyes or chocolate pieces until the day you plan to serve. They hold up better that way and won’t get soggy or bleed color into the frosting.
ChatGPT said:
FUN VARIATIONS TO TRY
I’ll be honest, once you start decorating these cupcakes, it’s hard to stop at just the designs I listed. There are so many fun twists you can play around with, and half the time my family is coming up with their own versions right at the counter.
Try turning a batch into ghost cupcakes by swirling white frosting high and adding two little chocolate chip eyes. Or go with black cat cupcakes by using dark frosting, adding licorice whiskers, and topping with candy ears. If you’ve got leftover candy from trick-or-treat night, press it right into the frosting and call it good—instant candy bar cupcakes.
You can even mix up the cake base itself. Vanilla, red velvet, or even pumpkin cupcakes make a killer foundation for these same decorations. Honestly, once you’ve got the frosting and a few add-ons, the possibilities are endless.
I love recipes like this because they remind me that fun food doesn’t have to be complicated. You don’t need pastry school skills or a fancy kitchen setup to make something that gets everyone smiling. These cupcakes are simple, colorful, and just the right amount of spooky. Whether you’re making them with kids, for a party, or just because you want to treat yourself, they deliver every single time.
So the next time Halloween sneaks up on you and you’re scrambling for a dessert, you’ll know exactly what to do. Pull out this recipe, grab a few supplies, and in no time you’ll have a tray of cupcakes that looks like you went all out—even though you totally didn’t.
Simple Halloween Cupcakes You Can Make in Minutes
Ingredients
Base cupcakes
- 24 baked and cooled chocolate cupcakes
Frosting
- 2 ½ cans vanilla or buttercream frosting (about 5 cups total), divided
- ½ can chocolate frosting
Decorations for spider cupcakes
- ½ can chocolate frosting
- 12 chocolate sandwich cookies
- 24 small candy eyes
Decorations for witch cupcakes
- Green gel food coloring
- Purple gel food coloring
- 12 chocolate sandwich cookies
- 12 plain chocolate drops or milk chocolate cones
Decorations for pumpkin cupcakes
- Orange gel food coloring
- Green gel food coloring
- ½ can chocolate frosting
Decorations for monster cupcakes
- Purple gel food coloring
- Green gel food coloring
- 24 candy eyes
Decorations for Mickey cupcakes
- Orange gel food coloring
- Yellow gel food coloring
- 24 small chocolate discs or mini sandwich cookies
Instructions
- Bake your chocolate cupcakes ahead of time, let them cool completely, and set out your frosting, food coloring, and decorations so everything is ready to go.
- For the spider cupcakes, spread white frosting on each cupcake, pipe four chocolate legs on each side with a #5 tip, press a cookie in the center, then add two small dots of frosting on top of the cookie and place candy eyes.
- For the witch cupcakes, tint about 2 cups of frosting green, pipe a flat swirl with a 1M tip, place a cookie in the center, add a small dollop of purple frosting, and finish with a chocolate drop on top to look like a witch’s hat.
- For the pumpkin cupcakes, tint about 2 cups of frosting orange, pipe stripes using a #47 tip with the flat side up, use chocolate frosting with a #5 tip to draw the face, and add green frosting for the stem.
- For the monster cupcakes, divide frosting into purple and green, pipe swirls with a 1M tip, and press candy eyes randomly over the top.
- For the Mickey cupcakes, split frosting into three parts and tint one yellow, one orange, and leave one plain, pipe a flat swirl of yellow frosting and chill 10 minutes, repeat with orange, chill again, then finish with white frosting on top, and press two chocolate discs or mini cookies into the sides for ears.
- Store the decorated cupcakes in the refrigerator for up to 3 days, keeping them covered so the frosting stays fresh.


