Homemade Tiramisu Made Simple — No Fancy Tools Needed
This homemade tiramisu came together on one of those lazy afternoons when I was craving something sweet, creamy, and coffee-soaked, but without a trip to the store or breaking out the fancy bakeware. You ever have those moments? You want dessert, but you also want to stay in your slippers. That was me. So I looked at what I had: eggs, sugar, coffee, a half-empty carton of cream, and a beat-up milk carton sitting by the sink. And I thought, why not?
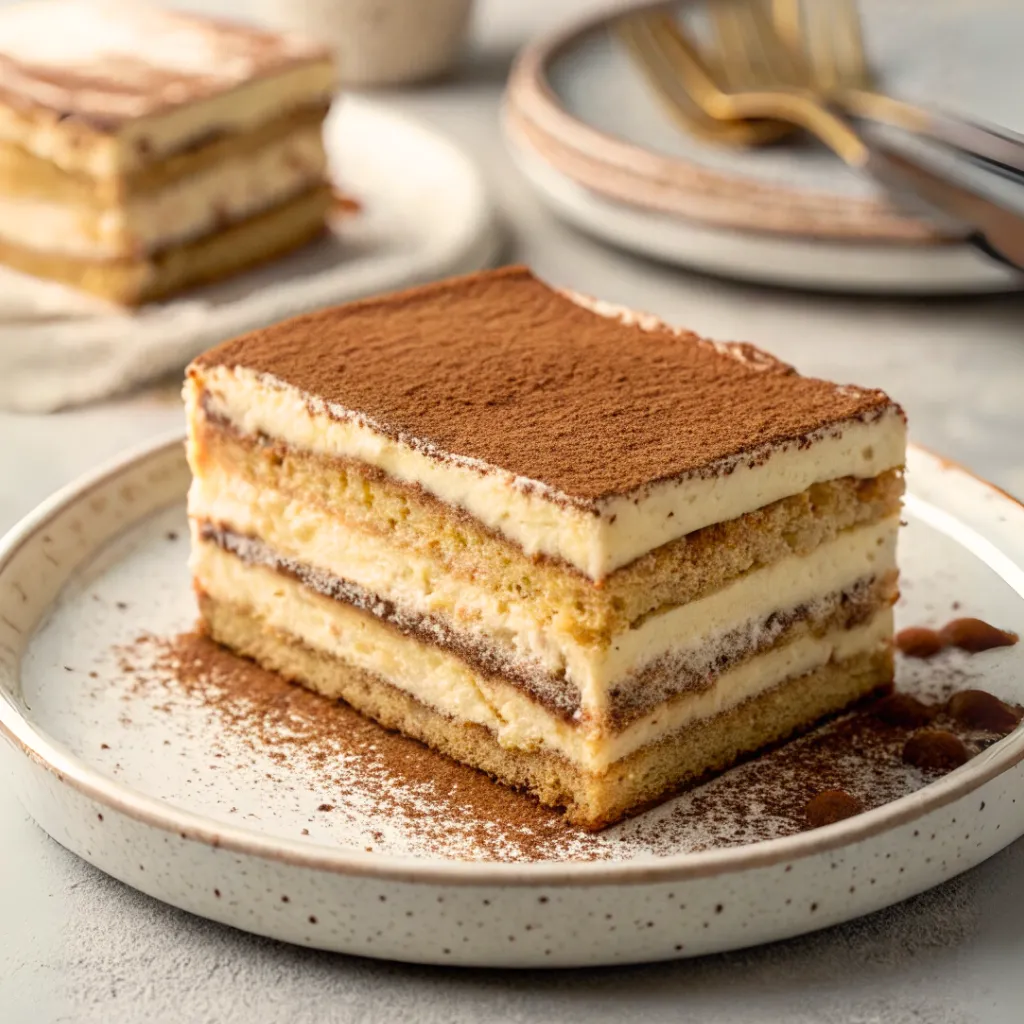
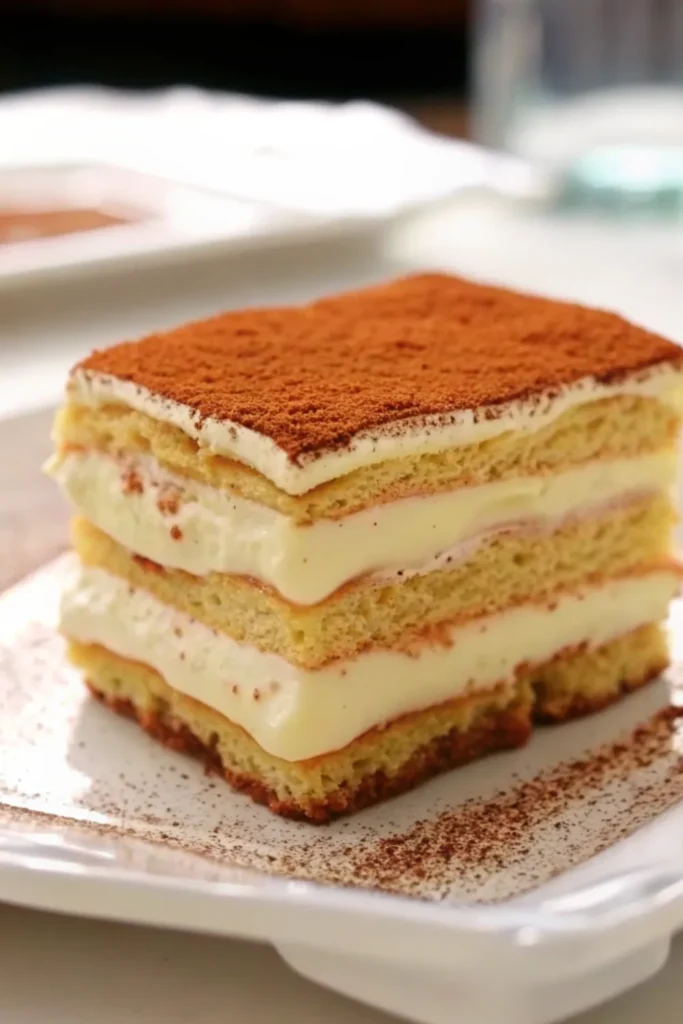
Tiramisu has this reputation for being complicated. Like something you only get at Italian restaurants with linen tablecloths. But honestly? It doesn’t have to be that way. When you strip it down, it’s just layers of sponge, cream, and coffee magic. And no, you don’t need store-bought ladyfingers or a springform pan to pull it off. I didn’t use either. In fact, I baked my own soft ladyfinger-style sheet, made the cream from scratch, and built the whole thing inside a cut-open milk carton.
If that sounds totally ridiculous, just wait till you try it. The results are pure bliss. Light, airy, bold with espresso, and smooth like a dream. No one will believe how simple it was, and that’s part of the fun.
Okay, let’s get into it.
WHY THIS RECIPE WORKS
- You don’t need fancy tools – No stand mixer, no piping tips, and definitely no tiramisu mold. I used a milk carton and a handheld whisk, and the results were just as dreamy. If you’ve got a bowl, a spoon, and a little patience, you’ve got what it takes.
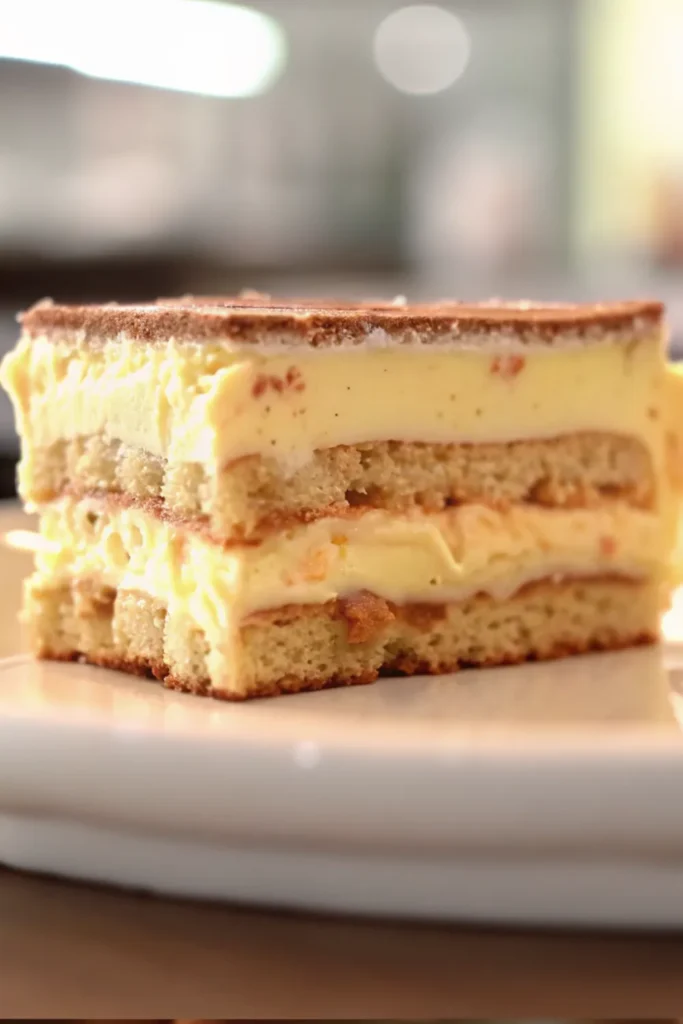
- The sponge is soft, not crunchy – A lot of tiramisu recipes use store-bought ladyfingers, which I find can end up a bit dry or crumbly unless you soak them aggressively. This version gives you a homemade sponge that stays tender and soaks up just the right amount of coffee without falling apart.
- The cream is rich, silky, and not too sweet – That balance is everything in tiramisu. The mascarpone brings creaminess, the egg yolks add depth, and the powdered sugar just sweetens the deal without overpowering it. I could eat this stuff with a spoon. And maybe I did.
- You can make your own mascarpone – If you can’t find good mascarpone at your local store, or you just like knowing exactly what’s in your food, there’s an easy method using just cream and lemon juice. I’ve included it in the post, and honestly, I was shocked at how well it turned out.
- It tastes even better the next day – Letting it chill overnight gives the flavors time to mingle. The coffee soaks deeper into the sponge, the cream firms up just enough, and the whole thing slices beautifully. Trust me, it’s worth the wait.
- It’s the kind of dessert that impresses people – Even though it’s made in a milk carton. Or maybe because it’s made in a milk carton. Either way, folks will ask for the recipe.
INGREDIENTS FOR HOMEMADE TIRAMISU
Ingredients for the sponge layer (soft ladyfinger sheet)
- 3 large eggs, separated
- 1/2 cup (100 g) granulated sugar, divided evenly
- Pinch of salt
- 1 cup (115 g) all-purpose flour
- 2 teaspoons (20 g) cornstarch
- Powdered sugar, for dusting
Ingredients for the cream filling
- 3 egg yolks
- 2/3 cup (80 g) powdered sugar
- 1½ packs (375 g) mascarpone cheese (store-bought or homemade)
Ingredients for assembly
- 1 cup strong, freshly brewed coffee (room temperature)
- Unsweetened cocoa powder, for dusting
Optional: Homemade mascarpone
- 2 cups (500 ml) heavy cream (at least 35% fat)
- 1 tablespoon lemon juice or distilled white vinegar
STEP BY STEP INSTRUCTIONS
- STEP 1) Separate the eggs, making sure no yolk gets into the whites. Beat the yolks with half the sugar until the mixture turns pale and lightly fluffy.
- STEP 2) In a clean bowl, whip the egg whites with a pinch of salt. Slowly add the rest of the sugar and keep whipping until stiff, glossy peaks form.
- STEP 3) Gently fold the whipped whites into the yolk mixture in two batches. Sift in the flour and cornstarch in stages, folding carefully so the batter stays light and airy.
- STEP 4) Pour the batter into a piping bag or zip-top bag with the corner snipped. Pipe into a rectangle on parchment paper, dust with powdered sugar, and bake at 350°F (175°C) for 12 to 14 minutes until lightly golden.
- STEP 5) Let the sponge cool fully. Trim it to fit your mold. Even a cut-open milk carton works great here.
- STEP 6) In a separate bowl, whisk the egg yolks and powdered sugar by hand until smooth. Then mix with a hand mixer until pale and thick.
- STEP 7) Add the mascarpone and beat until the cream is smooth and fully combined. Don’t overmix or it can go soupy on you.
- STEP 8) Place one trimmed sponge layer in the bottom of your mold. Spoon brewed coffee over the top to soak it. Spread half the cream evenly over that layer.
- STEP 9) Add the second sponge layer and repeat with more coffee. Finish it off with the rest of the cream.
- STEP 10) Cover and chill for at least 4 hours, preferably overnight. Dust generously with cocoa powder before serving.
EXPERT COOKING TIPS FOR HOMEMADE TIRAMISU
- Whip the egg whites in a clean, dry bowl. Any grease or leftover yolk will ruin your peaks, and trust me, floppy whites make for a flat sponge. I’ve learned the hard way—start clean.
- Don’t overmix the mascarpone cream. Once you add the mascarpone to the yolk mixture, mix just until it’s smooth. If you go too long, it can split or turn runny. Keep it gentle and stop as soon as it looks creamy.
- Use real brewed coffee, not instant. Fresh, strong coffee makes a big difference. You want that bold espresso flavor to cut through the sweetness and bring some grown-up depth to the dessert.
- Bake the sponge evenly by spreading it thin. If the batter’s too thick in spots, you’ll end up with undercooked patches. I like to use an offset spatula or the back of a spoon to level it out before baking.
- Let it chill overnight if you can. Four hours is fine in a pinch, but overnight gives the coffee and cream time to settle in together. It slices cleaner and honestly tastes better the next day.
RECIPE FAQ
How long does homemade tiramisu last in the fridge?
It'll stay good for up to 3 days, covered and chilled. Honestly though, it's usually gone by day two in my house. The flavors are best within the first 48 hours.
Can I freeze it?
Technically, yes, but I don't recommend it. The cream can separate a bit after thawing. If you do freeze it, wrap it tightly and eat it within a month. Let it thaw slowly in the fridge overnight.
What can I use instead of a milk carton?
Anything with straight sides will work—small loaf pans, glass containers, even a food storage container. Just don’t overthink it. Use what you’ve got.
HOW TO MAKE MASCARPONE AT HOME
If you’ve never made mascarpone before, don’t sweat it. I promise it’s not some mystical cheese trick reserved for fancy chefs. You just need two ingredients, a little patience, and something to strain with. That’s it.
To start, heat up 2 cups of heavy cream in a double boiler until it hits about 185 to 195°F. Keep it there for a few minutes, stirring constantly so it doesn’t scorch. Then stir in 1 tablespoon of lemon juice or distilled white vinegar and keep gently stirring for another 5 to 10 minutes. The cream should thicken slightly. Don’t expect dramatic curdling—it’ll still look mostly smooth.
Once it’s thickened a bit, take it off the heat and let it cool to room temperature. Pour it into a strainer lined with cheesecloth or a clean kitchen towel. Set it over a bowl and stick the whole setup in the fridge for 8 to 12 hours.
What you’ll get is a rich, spreadable mascarpone that’s super fresh and way more satisfying than anything in a tub. Just keep in mind you’ll lose a bit of volume while draining, but what you end up with is pure gold.
USING A MILK CARTON AS A DESSERT MOLD
Let me tell you, using a milk carton as a mold started as a total last-minute move—but it ended up being one of my favorite things about this recipe. I didn’t have a proper mold or loaf pan clean, and there it was: an empty carton on the counter, about to go in the recycling bin. I gave it a quick rinse, sliced it open lengthwise, and boom. Instant tiramisu mold.
What makes it work so well is the shape. It’s compact, rectangular, and holds the layers nicely without the cream sliding all over the place. You can chill the whole thing in the fridge, then snip or peel the sides away when you’re ready to serve. It’s kind of brilliant in a scrappy, DIY way.
And if you’re someone who doesn’t want to spend money on specialty bakeware, this little hack makes the recipe way more accessible. Honestly, I might start using cartons on purpose now.
Alright, let’s bring it home.
This recipe really showed me that you don’t need anything fancy to make something unforgettable. Just a few eggs, a block of cheese, strong coffee, and a milk carton you were probably about to throw out. That’s kind of the heart of cooking, right? Making something beautiful out of what you’ve already got.
So next time you’re craving something rich and comforting, skip the store-bought shortcuts. Make this homemade tiramisu. Keep it simple. Keep it real. And if you do end up using a milk carton like I did, I promise—no one will care once they take that first bite.

Homemade Tiramisu Made Simple — No Fancy Tools Needed
Ingredients
Ingredients for the sponge layer
- 3 large eggs, separated
- 1/2 cup (100 g) granulated sugar, divided evenly
- Pinch of salt
- 1 cup (115 g) all-purpose flour
- 2 teaspoons (20 g) cornstarch
- Powdered sugar, for dusting
Ingredients for the cream filling
- 3 egg yolks
- 2/3 cup (80 g) powdered sugar
- 1½ packs (375 g) mascarpone cheese (store-bought or homemade)
Ingredients for assembly
- 1 cup strong, freshly brewed coffee (room temperature)
- Unsweetened cocoa powder, for dusting
Instructions
- Separate the eggs, making sure no yolk gets into the whites. Beat the yolks with half the sugar until the mixture turns pale and lightly fluffy.
- In a clean bowl, whip the egg whites with a pinch of salt. Slowly add the rest of the sugar and keep whipping until stiff, glossy peaks form.
- Gently fold the whipped whites into the yolk mixture in two batches. Sift in the flour and cornstarch in stages, folding carefully so the batter stays light and airy.
- Pour the batter into a piping bag or zip-top bag with the corner snipped. Pipe into a rectangle on parchment paper, dust with powdered sugar, and bake at 350°F (175°C) for 12 to 14 minutes until lightly golden.
- Let the sponge cool fully. Trim it to fit your mold. Even a cut-open milk carton works great here.
- In a separate bowl, whisk the egg yolks and powdered sugar by hand until smooth. Then mix with a hand mixer until pale and thick.
- Add the mascarpone and beat until the cream is smooth and fully combined. Don’t overmix or it can go soupy on you.
- Place one trimmed sponge layer in the bottom of your mold. Spoon brewed coffee over the top to soak it. Spread half the cream evenly over that layer.
- Add the second sponge layer and repeat with more coffee. Finish it off with the rest of the cream.
- Cover and chill for at least 4 hours, preferably overnight. Dust generously with cocoa powder before serving.


