Homemade Burger Buns Recipe for Soft, Fluffy Perfection
This homemade burger buns recipe completely changed the way I feel about cookout season.
You ever bite into a burger and the bun just… gives up halfway through? Either it’s dry and crumbly, or it’s so soft it turns into a soggy sponge. Yeah, I’ve been there too. That’s exactly why I started testing and tweaking this recipe. I was determined to create a bun that could hold its own, no matter what you stack between it.
And the secret? Potatoes. I know, I know. It sounds a little weird if you’ve never tried it. But hear me out. That one russet potato adds the perfect moisture and structure, giving you a bun that’s soft, fluffy, and just sturdy enough to stay intact while you enjoy the main event. I tested this dough over and over, adjusting everything from the butter to the water temperature until I got buns that felt like little bakery pillows. The kind that actually elevate your burger instead of just tagging along for the ride.
These buns also happen to work for everything. Fried chicken sandwiches, breakfast sandwiches, pulled pork, even just a swipe of butter and jam. I promise, once you make a batch of these, you won’t be reaching for the store-bought ones again.
Ready? Let’s do this.

WHY YOU WILL LOVE THIS RECIPE
- Real potatoes make a real difference – That little addition of mashed russet potato? It changes everything. You get buns that are soft, tender, and flavorful, but still sturdy enough to handle juicy burgers or saucy sandwiches.
- Perfect balance of softness and structure – These aren’t flimsy, fall-apart buns, and they’re not too dense either. They’ve got that light, airy texture you want with just enough chew to hold up to toppings and fillings.
- Better than store-bought – Once you taste these fresh out of the oven, brushed with melted butter, there’s no going back. Seriously, I tried one and immediately questioned every plastic-wrapped bun I’ve ever bought.
- Great for more than just burgers – Yes, they’re burger buns, but they’re also perfect for chicken sandwiches, sliders, breakfast egg sandwiches, or even as soft dinner rolls. Total multipurpose win.
- Make-ahead friendly – You can bake them in advance and freeze for later. They thaw beautifully and still taste like you just made them.
- Beginner-friendly process – Even though it’s a yeasted dough, the steps are pretty forgiving. I walk you through every part, and once you’ve made them once, you’ll have the confidence to do it again.
INGREDIENTS FOR HOMEMADE BURGER BUNS
These buns are broken down into two simple parts: prepping the potato and making the dough. If you’ve got a stand mixer, it’ll make your life easier, but don’t worry — I’ve included notes for doing it by hand too. Let’s break it down.
Potato prep
- 1 large russet potato, peeled
- Water, enough to fully submerge the potato while boiling
Dough
- 245g whole milk, plus more for brushing
- 55g water
- 7g active dry yeast
- 50g granulated sugar
- 575g bread flour
- 14g fine sea salt
- 1g amylase (optional, plant-based or omitted)
- ½ tsp turmeric powder
- 25g neutral oil (vegetable, canola, or avocado)
- 1 large egg
- 1 large egg yolk
- 120g mashed russet potato (from above)
- 30g halal-certified unsalted butter or ghee, softened, plus more for brushing after baking
STEP BY STEP INSTRUCTIONS
- STEP 1). Boil the peeled potato in water until completely soft, about 20 to 40 minutes depending on size, then mash it through a fine mesh strainer until silky smooth.
- STEP 2). In a small bowl, warm the milk and water to 90–95°F, whisk in the yeast and sugar, and let it sit for about 2 minutes until foamy.
- STEP 3). In a stand mixer bowl, whisk together the bread flour, salt, turmeric, and optional amylase, then add in the yeast mixture, oil, egg, egg yolk, and mashed potato and mix on low for 5 minutes until smooth and elastic.
- STEP 4). Add the softened butter and continue mixing for another 2 to 3 minutes until the dough becomes shiny, sticky, and fully pulled together.
- STEP 5). Grease your hands and a bowl, form the dough into a rough ball, place it in the bowl, cover with plastic wrap or a damp towel, and let it rise for 1½ to 2 hours until doubled in size.
- STEP 6). Punch down the dough, turn it out onto a work surface, divide into 10 to 12 pieces (about 105g each), shape into balls, and gently flatten each one.
- STEP 7). Place the dough balls seam-side down on greased parchment-lined baking sheets, flatten slightly with the bottom of a glass, cover loosely, and let them rise again for 30 to 60 minutes until puffed.
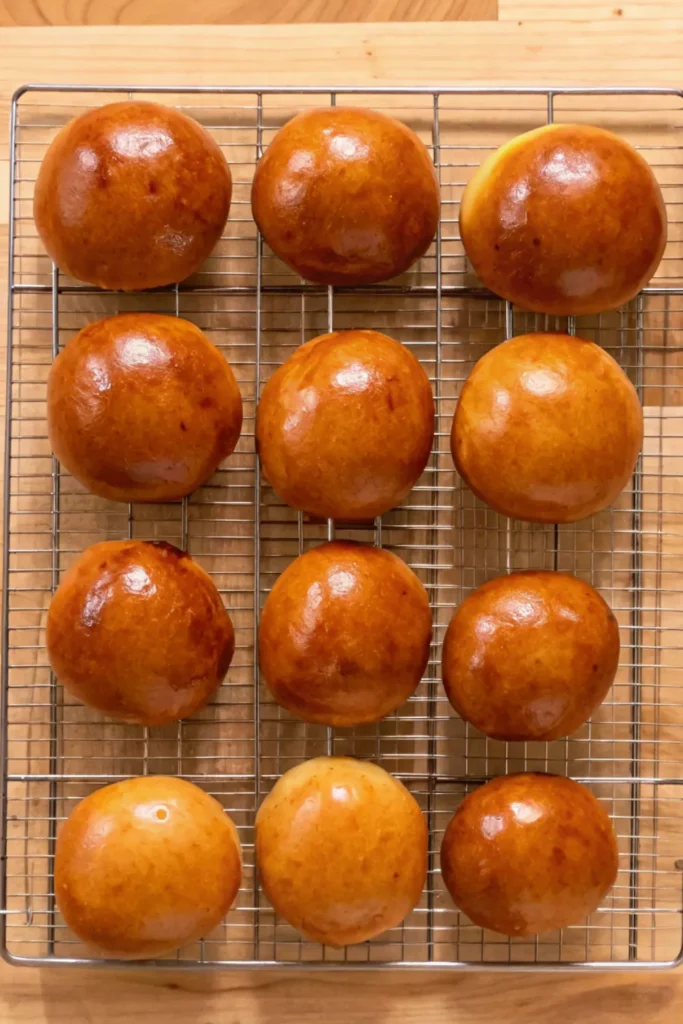
- STEP 8). Brush the tops lightly with milk and bake at 375°F (191°C) for 15 to 17 minutes, until golden brown.
- STEP 9). Immediately brush the tops with melted butter and cool the buns completely on a wire rack before slicing or storing.
EXPERT COOKING TIPS
- Don’t skip the potato straining. I know it’s tempting to just mash and move on, but straining the potato makes a big difference. It keeps the dough silky smooth and gives the buns their signature soft texture.
- Watch your water temperature. Yeast is picky. If your milk and water mixture is too hot, you’ll kill it. Too cold and it won’t activate. Stick to around 90–95°F — warm to the touch but not hot.
- The dough will be sticky — that’s a good thing. This is not a dry, firm dough. It’s soft, stretchy, and a little messy to handle. Grease your hands if needed, and trust the process.
- Don’t overpack the baking tray. These buns rise a lot in the oven. Give them enough space on the tray or you’ll end up with a tray of conjoined bread blobs. Tasty, yes, but not ideal.
- Brush with milk before baking and butter after. That one-two combo gives you golden, shiny tops with a soft, flavorful finish. Don’t skip either step unless you want sad buns (and nobody wants sad buns).
RECIPE FAQ
Do I really need to use a potato?
Yes, that’s kind of the magic here. The mashed potato adds moisture and tenderness you just won’t get otherwise. It’s worth the extra step.
Can I knead this dough by hand if I don’t have a mixer?
You bet. It takes more time and elbow grease, and you’ll want to use the slap-and-fold method to get the right texture. Also, swap the softened butter for the same amount of oil to make it easier to mix in.
How long do these buns stay fresh?
They’re best the day they’re baked but still great for 3–4 days if stored in an airtight container at room temp. After that, I recommend freezing them.
HOW TO STORE AND FREEZE THESE BUNS
Once these buns are baked and cooled, you’ve got a couple solid options to keep them fresh — because trust me, you’re gonna want leftovers.
To store:
Let the buns cool completely on a wire rack, then pop them into an airtight container or zip-top bag. They’ll stay soft at room temperature for up to 4 days. If your kitchen runs warm or humid, slide in a paper towel to help absorb any extra moisture.
To freeze:
Wrap each bun individually in plastic wrap or foil, then toss them in a freezer bag or container. This keeps them from getting freezer burn or sticking together. They’ll last a good 2 to 3 months this way. When you’re ready to eat, just thaw at room temp for an hour or warm in the oven at 300°F for about 5 to 8 minutes. Boom, bakery-fresh.
WHAT TO SERVE WITH THESE BURGER BUNS
These buns are incredibly versatile, so don’t box them into just burger duty. You’ve got options, my friend — and they’re all delicious.
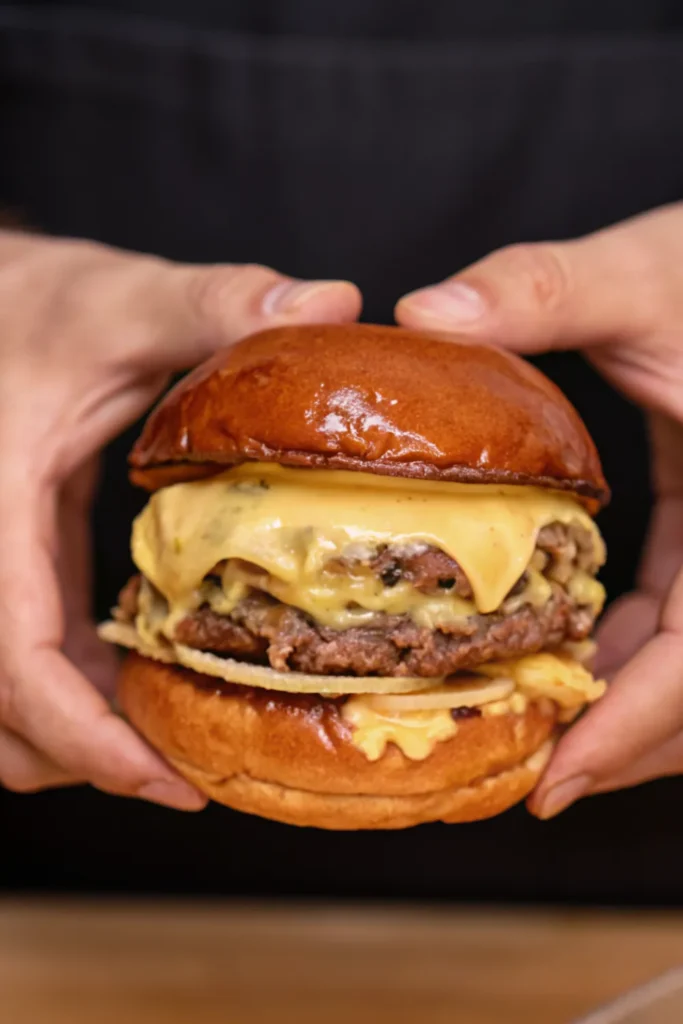
Classic beef burgers:
Obviously. Smash burgers, grilled patties, double-stacks with cheese — these buns are built for it. They’re soft enough to bite through, but they hold up like champs under juicy, saucy layers.
Crispy chicken sandwiches:
Fried, grilled, or even leftover rotisserie chicken dressed up with slaw and sauce. The slightly sweet flavor of the bun plays beautifully with savory, crunchy chicken.
Breakfast sandwiches:
Egg, cheese, sausage, or even avocado and hot sauce. Toast the bun lightly and you’ve got a breakfast that makes drive-thru sandwiches look sad.
Pulled meats or BBQ:
Pulled beef, chicken, or brisket? Toss it in sauce and pile it high. These buns soak up all that goodness without falling apart halfway through.
Simple spreads or buttered buns:
Don’t underestimate a warm bun with good butter. Or jam. Or both. Sometimes the simplest combo hits hardest.
And that brings us full circle.
These buns aren’t just a recipe — they’re a game-changer. I make a double batch almost every time because they vanish faster than I can bake them. Whether you’re grilling out, prepping for the week, or just want to up your sandwich game, these homemade burger buns have your back.
Got questions? Leave them below — I love hearing how your kitchen experiments turn out.

Homemade Burger Buns Recipe for Soft, Fluffy Perfection
Ingredients
Potato prep
- 1 large russet potato, peeled
- Water, enough to fully submerge the potato while boiling
Dough
- 245g whole milk, plus more for brushing
- 55g water
- 7g active dry yeast
- 575g bread flour
- 14g fine sea salt
- 1g amylase (optional, plant-based or omitted)
- ½ tsp turmeric powder
- 25g neutral oil (vegetable, canola, or avocado)
- 1 large egg
- 1 large egg yolk
- 120g mashed russet potato (from above)
- 30g halal-certified unsalted butter or ghee, softened, plus more for brushing after baking
Instructions
- Boil the peeled potato in water until completely soft, about 20 to 40 minutes depending on size, then mash it through a fine mesh strainer until silky smooth.
- In a small bowl, warm the milk and water to 90–95°F, whisk in the yeast and sugar, and let it sit for about 2 minutes until foamy.
- In a stand mixer bowl, whisk together the bread flour, salt, turmeric, and optional amylase, then add in the yeast mixture, oil, egg, egg yolk, and mashed potato and mix on low for 5 minutes until smooth and elastic.
- Add the softened butter and continue mixing for another 2 to 3 minutes until the dough becomes shiny, sticky, and fully pulled together.
- Grease your hands and a bowl, form the dough into a rough ball, place it in the bowl, cover with plastic wrap or a damp towel, and let it rise for 1½ to 2 hours until doubled in size.
- Punch down the dough, turn it out onto a work surface, divide into 10 to 12 pieces (about 105g each), shape into balls, and gently flatten each one.
- Place the dough balls seam-side down on greased parchment-lined baking sheets, flatten slightly with the bottom of a glass, cover loosely, and let them rise again for 30 to 60 minutes until puffed.
- Brush the tops lightly with milk and bake at 375°F (191°C) for 15 to 17 minutes, until golden brown.
- Immediately brush the tops with melted butter and cool the buns completely on a wire rack before slicing or storing.