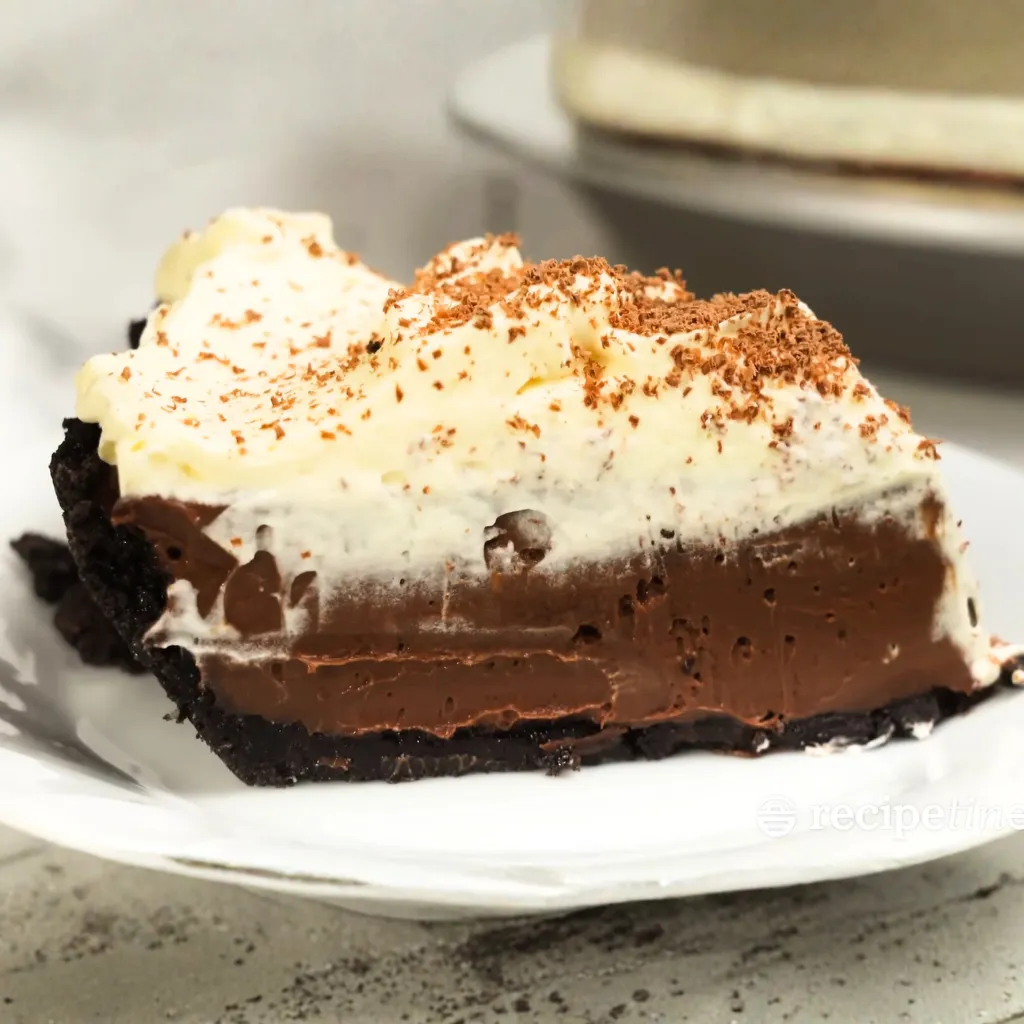
Chocolate Cream Pie Recipe Made From Scratch (No Pudding Mix!)
This chocolate cream pie recipe is one of those desserts that makes you stop and close your eyes for a second after the first bite. You know the kind I’m talking about, the ones that make you forget about everything else happening in the kitchen. I still remember the first time I made it. I was standing there with a spoon, hovering over the pie dish, just checking the texture, and before I knew it, half the filling had mysteriously disappeared.
I’ve always believed that if you’re going to make dessert, make it worth the calories. And let me tell you, this pie absolutely is. It’s the kind of recipe that reminds me why homemade always wins. No boxed pudding, no shortcuts, just real ingredients coming together in the most satisfying way. The filling is silky and rich without being heavy, the crust gives that perfect chocolate crunch, and the whipped cream, well, it’s like a soft cloud on top of all that decadence.
What I love most is how approachable it is. It might sound fancy, like “chocolate custard” or “from scratch,” but the process is simple once you get started. You don’t need pastry school training or a special pie pan passed down through generations. Just a few everyday ingredients, a whisk, and a little patience. Trust me, once you see that smooth chocolate filling set up in the fridge, you’ll feel like a dessert pro.
And if you’ve ever wondered whether a pie could make people instantly like you, this one will prove it. Every time I make it, friends suddenly appear out of nowhere with forks in hand.
WHY YOU WILL LOVE THIS RECIPE
- Rich, creamy filling that feels like silk – The chocolate custard filling has that perfect balance of smooth and dense, almost like pudding but richer. Every bite melts in your mouth and makes you wonder why anyone would ever use a boxed mix again.
- No shortcuts, just real ingredients – This pie is made from scratch with butter, real chocolate, and cream. You can taste the difference. It’s honest, homemade comfort food, and there’s something deeply satisfying about that.
- The crust is ridiculously easy – You only need two ingredients for the base, cookies and butter. That’s it. Press it in, bake for ten minutes, and you’ve got a sturdy, crunchy shell ready to hold all that chocolate goodness.
- It’s a make-ahead dream – The pie needs time to chill, which means you can make it a full day before you need it. By the time dessert rolls around, you’ll look like you planned everything perfectly.
- Looks fancy, but it’s secretly simple – People will assume you spent all day making it, but really, it’s just a few easy steps. Whisk, pour, chill, and you’re done. It’s one of those desserts that make you look like a pro without breaking a sweat.
- Crowd-pleaser every single time – Whether it’s a family dinner or a casual get-together, everyone lights up when this pie hits the table. There are never leftovers, and if there are, they won’t last the night.
INGREDIENTS FOR CHOCOLATE CREAM PIE RECIPE
Crust
- 25 chocolate sandwich cookies (about 244 g / 8.5 oz)
- 4 tablespoons (60 g) unsalted butter, melted
Filling
- 1/4 cup cornflour or cornstarch
- 2/3 cup caster sugar (superfine sugar)
- Pinch of salt
- 2 cups milk (whole or reduced fat, but not fat-free)
- 1 cup thickened or heavy cream (or sub with milk if preferred)
- 4 large egg yolks
- 2 tablespoons (30 g) unsalted butter, cut into small cubes
- 1 teaspoon non-alcoholic vanilla essence or vanilla bean paste
- 150 g (5 oz) dark chocolate, finely chopped
- 75 g (3 oz) milk chocolate, finely chopped
Whipped Cream Topping
- 1 1/2 cups thickened or heavy cream, for whipping
- 2 tablespoons white sugar
- 1/2 teaspoon non-alcoholic vanilla essence
Optional Garnish
- Grated chocolate for decoration

STEP BY STEP INSTRUCTIONS
- STEP 1) Preheat your oven to 180°C (350°F) and grab a 23 cm (9-inch) pie dish.
- STEP 2) Break the cookies into chunks and place them in a food processor, then pulse until they become fine crumbs. Add the melted butter and blend again until the texture looks like damp sand.
- STEP 3) Pour the crumb mixture into the pie dish and press it firmly into the base and up the sides using your fingers or the bottom of a glass. Make sure it’s even all around.
- STEP 4) Bake the crust for about 10 minutes until slightly puffed, then remove it from the oven. Press the crust gently with a spatula while it’s still warm to compact it, then let it cool completely before adding the filling.
- STEP 5) In a large saucepan, whisk together the cornflour, sugar, and salt. Add the milk, cream, and egg yolks, and whisk until smooth.
- STEP 6) Place the saucepan over medium-high heat and cook, whisking occasionally at first, then constantly once it starts to steam. Keep whisking until the mixture thickens and slow bubbles appear, which should take about 6 minutes.
- STEP 7) Once it thickens, keep whisking for another 45 seconds, then remove from the heat. Add the butter, chopped dark and milk chocolates, and vanilla. Stir until everything is melted and the filling is silky smooth.
- STEP 8) Pour the hot chocolate filling into the cooled crust, smoothing the surface with a spatula. Gently lay a piece of parchment paper directly on top of the filling to stop a skin from forming.
- STEP 9) Let the pie cool at room temperature for about 2 hours, then transfer it to the fridge and chill for at least 12 hours so the filling can fully set.
- STEP 10) When ready to serve, whip the cream, sugar, and vanilla together until soft peaks form, then spread it over the chilled pie.
- STEP 11) Sprinkle the top with grated chocolate, slice carefully, and serve straight from the dish.

EXPERT COOKING TIPS
- Keep the heat steady. When you’re cooking the filling, don’t rush it. Medium heat gives the custard time to thicken without scorching or turning grainy. If it thickens too fast, lower the heat and keep whisking until smooth again.
- Use good-quality chocolate. The flavor of this pie depends on the chocolate you choose, so go for one you actually enjoy eating. A mix of dark and milk chocolate gives it depth and creaminess at the same time.
- Whisk like you mean it. Once the custard starts to steam, whisk constantly. That’s the key to keeping it lump-free and silky. A little arm workout now saves you from clumpy filling later.
- Cool it completely. Letting the pie set for at least 12 hours isn’t just a suggestion—it’s what turns the filling from soft pudding into perfect slices. If you rush it, it’ll taste great but won’t hold shape.
- Stabilize the whipped cream if needed. If you’re making this pie a day ahead, mix a spoonful of mascarpone into the cream before whipping. It helps the topping stay fluffy without deflating.
RECIPE FAQ
Can I use only dark chocolate for the filling?
You can, but it will make the pie more intense and slightly less sweet. I like the mix of dark and milk chocolate because it gives that perfect balance of flavor and texture.
How far ahead can I make this pie?
You can make it up to two days in advance. Keep it chilled and covered in the fridge, then top it with whipped cream just before serving so it stays fresh and fluffy.
Why did my filling turn out lumpy?
That usually happens if the custard cooks too quickly or isn’t whisked enough once it starts to thicken. Don’t worry though, you can fix it by straining the hot mixture through a fine mesh sieve before pouring it into the crust.
MAKE IT AHEAD OR STORE IT RIGHT
One of the best things about this pie is how forgiving it is. You can make it a full day before you need it and it’ll still taste like you just pulled it out of the fridge. In fact, I actually prefer it that way. The filling firms up perfectly overnight, and the flavor deepens a bit too.
If you’re making it in advance, cover the pie tightly with plastic wrap or foil before chilling. Add the whipped cream just before serving so it stays fluffy and bright. Once topped, the pie will keep for about three days in the fridge, though the crust might start to soften after that.
Freezing isn’t ideal because the texture of the custard can change when thawed. If you really need to freeze it, do it before adding the whipped cream, then thaw it slowly in the fridge overnight.
CHOCOLATE VARIATIONS YOU’LL WANT TO TRY
- Salted caramel twist. Drizzle a few spoonfuls of caramel sauce over the chocolate filling before chilling it. A sprinkle of flaky sea salt on top of the whipped cream ties it all together beautifully.
- Mocha cream pie. Stir a teaspoon of instant espresso powder into the hot filling before adding the chocolate. It brings out the cocoa flavor and gives the pie a subtle coffee kick that’s seriously addictive.
- Peanut butter layer. Spread a thin layer of creamy peanut butter over the crust before pouring in the filling. The combination of chocolate and peanut butter tastes like something straight out of a bakery case.
- Mint chocolate pie. Add a few drops of peppermint extract to the filling and top it with crushed mint chocolate pieces. It’s cool, fresh, and perfect for the holidays.
- White and dark chocolate swirl. Melt a bit of white chocolate separately and swirl it through the warm filling right before you pour it into the crust. It looks fancy without any extra effort.
And honestly, that’s the fun part of this recipe. Once you’ve nailed the base, it’s your playground. You can swap flavors, layer sauces, or even turn it into mini pies if you’re feeling creative.
I still remember the first time I made the classic version for a dinner party, and everyone asked for seconds before the plates were even cleared. It’s the kind of recipe that makes you feel like you’ve done something really special, even if it was just a simple night in your kitchen.
So, grab your whisk, a good bar of chocolate, and a little patience, and you’ll have something truly unforgettable waiting in the fridge.
Chocolate Cream Pie Recipe Made From Scratch (No Pudding Mix!)
Ingredients
Crust
- 25 chocolate sandwich cookies (about 244 g / 8.5 oz)
- 4 tablespoons (60 g) unsalted butter, melted
Filling
- 1/4 cup cornflour or cornstarch
- 2/3 cup caster sugar (superfine sugar)
- Pinch of salt
- 2 cups milk (whole or reduced fat, but not fat-free)
- 1 cup thickened or heavy cream (or sub with milk if preferred)
- 4 large egg yolks
- 2 tablespoons (30 g) unsalted butter, cut into small cubes
- 1 teaspoon non-alcoholic vanilla essence or vanilla bean paste
- 150 g (5 oz) dark chocolate, finely chopped
- 75 g (3 oz) milk chocolate, finely chopped
Whipped Cream Topping
- 1 1/2 cups thickened or heavy cream, for whipping
- 2 tablespoons white sugar
- 1/2 teaspoon non-alcoholic vanilla essence
Optional Garnish
- Grated chocolate for decoration
Instructions
- Preheat your oven to 180°C (350°F) and grab a 23 cm (9-inch) pie dish.
- Break the cookies into chunks and place them in a food processor, then pulse until they become fine crumbs. Add the melted butter and blend again until the texture looks like damp sand.
- Pour the crumb mixture into the pie dish and press it firmly into the base and up the sides using your fingers or the bottom of a glass. Make sure it’s even all around.
- Bake the crust for about 10 minutes until slightly puffed, then remove it from the oven. Press the crust gently with a spatula while it’s still warm to compact it, then let it cool completely before adding the filling.
- In a large saucepan, whisk together the cornflour, sugar, and salt. Add the milk, cream, and egg yolks, and whisk until smooth.
- Place the saucepan over medium-high heat and cook, whisking occasionally at first, then constantly once it starts to steam. Keep whisking until the mixture thickens and slow bubbles appear, which should take about 6 minutes.
- Once it thickens, keep whisking for another 45 seconds, then remove from the heat. Add the butter, chopped dark and milk chocolates, and vanilla. Stir until everything is melted and the filling is silky smooth.
- Pour the hot chocolate filling into the cooled crust, smoothing the surface with a spatula. Gently lay a piece of parchment paper directly on top of the filling to stop a skin from forming.
- Let the pie cool at room temperature for about 2 hours, then transfer it to the fridge and chill for at least 12 hours so the filling can fully set.
- When ready to serve, whip the cream, sugar, and vanilla together until soft peaks form, then spread it over the chilled pie.
- Sprinkle the top with grated chocolate, slice carefully, and serve straight from the dish.


