Chewy Peanut Butter Cookies You’ll Bake on Repeat
This peanut butter cookies recipe has become one of those treats I find myself baking over and over. And I’m not even a huge peanut butter person.
I still remember the first time I made these. It was one of those gloomy afternoons when I just needed something warm and comforting in the kitchen, and these cookies totally hit the spot. They came out soft in the center, with just enough crispiness around the edges to give you that perfect cookie bite. My kids devoured half the batch before they even cooled. I knew I had to write this one down.
You ever have a cookie that takes you right back to something familiar? School bake sales. Grandma’s kitchen. Sneaking spoonfuls of dough when no one’s looking. These cookies do that. They’re not fancy. But they don’t need to be. They just work. Every time.
If you’ve got a jar of peanut butter hanging around and a craving for something cozy, grab your mixer and let’s make a batch together.

WHY YOU WILL LOVE THIS RECIPE
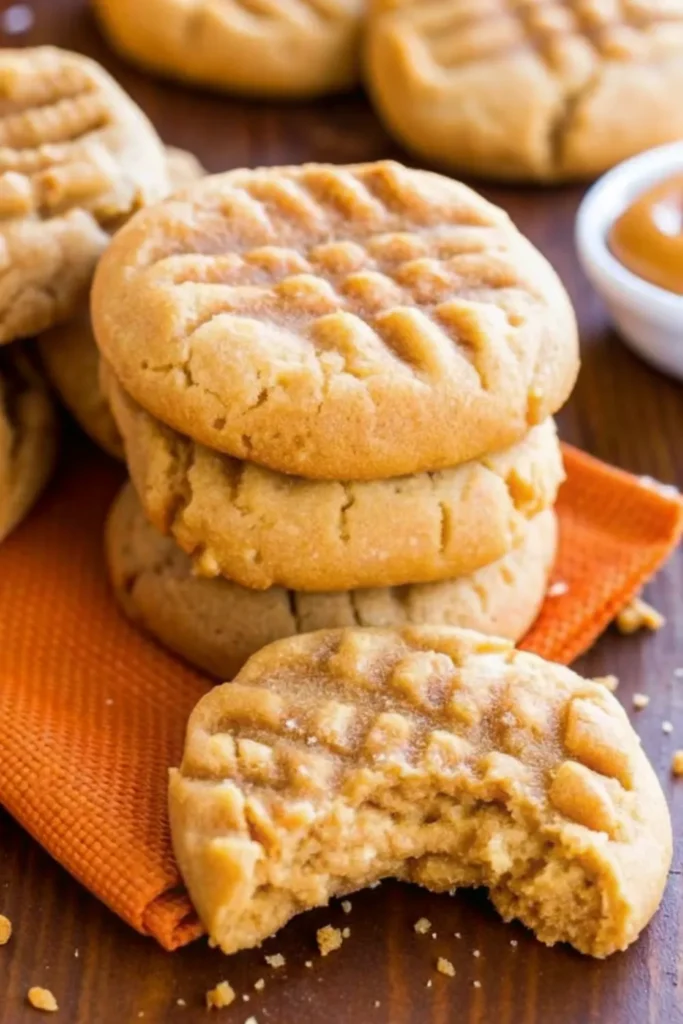
- That soft-meets-crispy texture – These cookies have that dreamy combo of crispy edges and soft centers. I spent a few rounds testing the bake time to get it just right, and trust me, they’re spot-on now.
- They actually stay chewy – A lot of cookies dry out by day two. Not these. Thanks to the creamy peanut butter and a good chill in the fridge, they stay moist and chewy for days.
- No crazy ingredients – Everything in this recipe is basic pantry stuff. You don’t need fancy flour or specialty tools. Just butter, sugar, peanut butter, and a bit of time.
- That classic peanut butter flavor – It’s bold, rich, and balanced without being overwhelming. If you love peanut butter, this one’s for you. If you don’t? You might still find yourself reaching for a second one.
- They freeze like a dream – Bake the whole batch or just a few at a time. These freeze beautifully, dough or baked. I always keep a stash tucked in the back of the freezer.
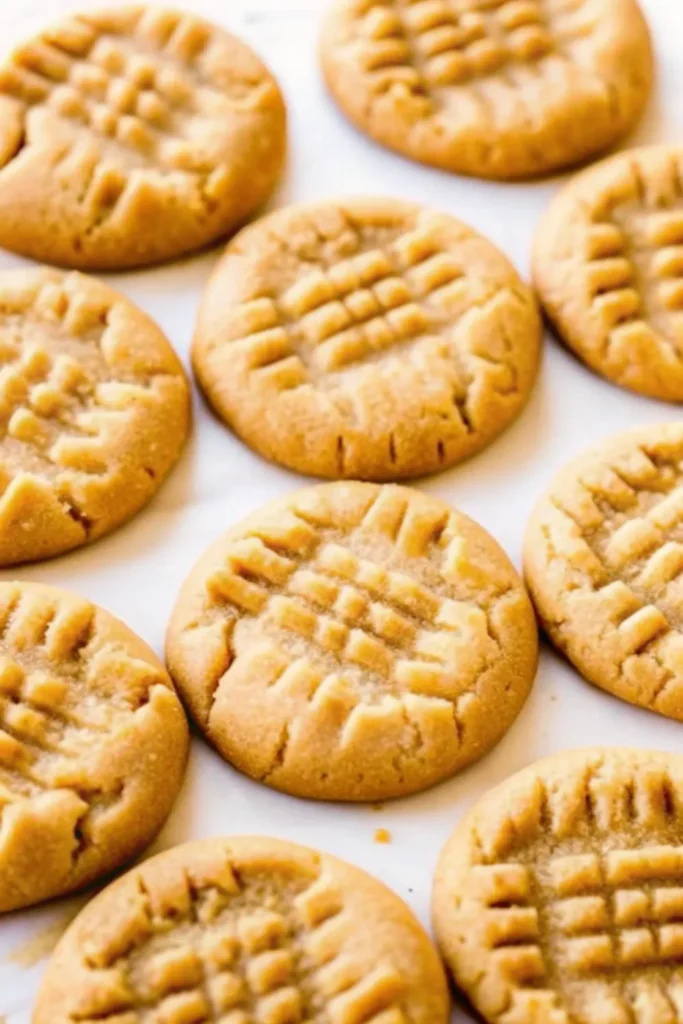
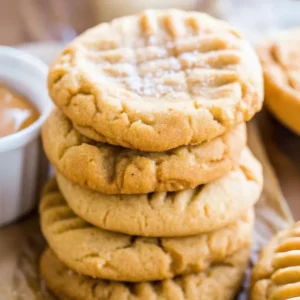
- They look like old-school cookies should – That criss-cross fork pattern gives them that nostalgic, just-like-mom’s look. It’s comforting. And kind of charming.
INGREDIENTS FOR PEANUT BUTTER COOKIES
Wet ingredients
- 1 cup (226g) unsalted butter, softened to room temperature
- 1 cup (200g) granulated sugar
- 3/4 cup (150g) packed light brown sugar
- 2 large eggs, room temperature
- 2 teaspoons alcohol-free vanilla extract
- 1 cup (250g) creamy peanut butter
Dry ingredients
- 3 cups (375g) all-purpose flour (spooned and leveled)
- 1 teaspoon baking soda
- 1 teaspoon baking powder
- 1/2 teaspoon salt
For rolling (optional)
- 1/3 cup (67g) granulated sugar
STEP BY STEP INSTRUCTIONS
- STEP 1). Cream the softened butter, granulated sugar, and brown sugar together in a large bowl using a hand or stand mixer until smooth.
- STEP 2). Add the eggs one at a time, mixing well after each, then mix in the vanilla and peanut butter until fully combined.
- STEP 3). In a separate bowl, whisk together the flour, baking soda, baking powder, and salt, then slowly add the dry ingredients to the wet and mix on low until a thick, sticky dough forms.
- STEP 4). Cover the dough and chill it in the fridge for at least 3 hours, or up to 2 days if you get distracted and forget about it like I did once.
- STEP 5). Preheat the oven to 350°F (177°C) and line two large baking sheets with parchment paper or silicone baking mats.
- STEP 6). Roll balls of dough (about 1.5 tablespoons each), roll them in sugar if you like, and place them 2 inches apart on the baking sheets.
- STEP 7). Press a fork into the tops to create the classic criss-cross pattern, then bake for 12 to 13 minutes until the edges are lightly golden.
- STEP 8). Let the cookies cool on the baking sheet for 5 minutes, then move them to a wire rack to cool completely.
EXPERT COOKING TIPS
- Don’t skip the chilling time. I know it’s tempting to rush, but chilling the dough really helps the cookies hold their shape and stay thick and chewy instead of spreading too much in the oven.
- Spoon and level your flour. Too much flour makes dry cookies, and it’s easy to overpack a measuring cup. Use a spoon to fill the cup and level it off with a knife for accuracy.
- Cream the butter and sugars well. This step builds the base for that perfect soft texture. Give it at least 2 minutes on medium speed until it looks fluffy and smooth.
- Use a cookie scoop if you have one. It keeps the cookie size consistent so they bake evenly. Plus, it’s just a little more fun that way.
- Watch the edges, not the centers. Pull them from the oven when the edges are lightly golden but the centers still look a little soft. They’ll finish setting on the baking sheet.
RECIPE FAQ
Do I really have to chill the dough?
Yes. I know, waiting is the worst. But the chill time helps control spreading and keeps the cookies thick and chewy. If you skip it, they’ll still taste good but won’t hold their shape as well.
Can I make the dough ahead of time?
Absolutely. You can chill it for up to 2 days, or scoop it into balls and freeze them for later. I bake them straight from the freezer all the time — just add one extra minute to the bake time.
How do I store the cookies to keep them fresh?
Once they’re fully cooled, store them in an airtight container at room temp. They stay soft for about a week. If they start to dry out, toss a slice of bread in the container to bring some moisture back.
CAN I FREEZE THE DOUGH FOR LATER?
Absolutely, and honestly, I recommend it. Life gets busy, and having cookie dough ready to go in the freezer has saved me more than once when I needed a last-minute treat.
Once your dough is chilled and firm, scoop it into balls, then lay them out on a baking sheet and freeze until solid. After that, just toss them into a zip-top bag or airtight container. They’ll keep for up to 3 months.
When you’re ready to bake, no need to thaw. Just pop the frozen dough balls straight onto your baking sheet and add an extra minute or two to the bake time. It’s cookie magic, no fuss required.
THE STORY BEHIND THE CRISS-CROSS COOKIE PATTERN
You know that classic fork pattern on top of peanut butter cookies? It’s not just for looks — though I’ll admit, it does make them look old-school and kinda charming.
Back in the 1930s, peanut butter dough was thicker and heavier than most cookie doughs, so pressing it down with a fork helped it bake more evenly. The pattern also helped distinguish peanut butter cookies from others at a glance. Smart, right?
That tradition stuck around, and now it’s just part of the peanut butter cookie identity. Every time I press that fork into the dough, I feel a little like I’m keeping a bit of baking history alive. Simple things, but they mean something.
Anyway, if you’ve never made these cookies before, now’s your chance. Whether you bake the whole batch today or stash some dough for later, I promise you’ll be coming back to this recipe again and again. It’s one of those simple wins that never gets old.
Let me know how yours turn out — and if you catch yourself sneaking one while they’re still warm, don’t worry. I do it too.
Chewy Peanut Butter Cookies You’ll Bake on Repeat
Ingredients
Wet ingredients
- 1 cup (226g) unsalted butter, softened to room temperature
- 1 cup (200g) granulated sugar
- 3/4 cup (150g) packed light brown sugar
- 2 large eggs, room temperature
- 2 teaspoons alcohol-free vanilla extract
- 1 cup (250g) creamy peanut butter
Dry ingredients
- 3 cups (375g) all-purpose flour (spooned and leveled)
- 1 teaspoon baking soda
- 1 teaspoon baking powder
- 1/2 teaspoon salt
For rolling (optional)
- 1/3 cup (67g) granulated sugar
Instructions
- Cream the softened butter, granulated sugar, and brown sugar together in a large bowl using a hand or stand mixer until smooth.
- Add the eggs one at a time, mixing well after each, then mix in the vanilla and peanut butter until fully combined.
- In a separate bowl, whisk together the flour, baking soda, baking powder, and salt, then slowly add the dry ingredients to the wet and mix on low until a thick, sticky dough forms.
- Cover the dough and chill it in the fridge for at least 3 hours, or up to 2 days if you get distracted and forget about it like I did once.
- Preheat the oven to 350°F (177°C) and line two large baking sheets with parchment paper or silicone baking mats.
- Roll balls of dough (about 1.5 tablespoons each), roll them in sugar if you like, and place them 2 inches apart on the baking sheets.
- Press a fork into the tops to create the classic criss-cross pattern, then bake for 12 to 13 minutes until the edges are lightly golden.
- Let the cookies cool on the baking sheet for 5 minutes, then move them to a wire rack to cool completely.


