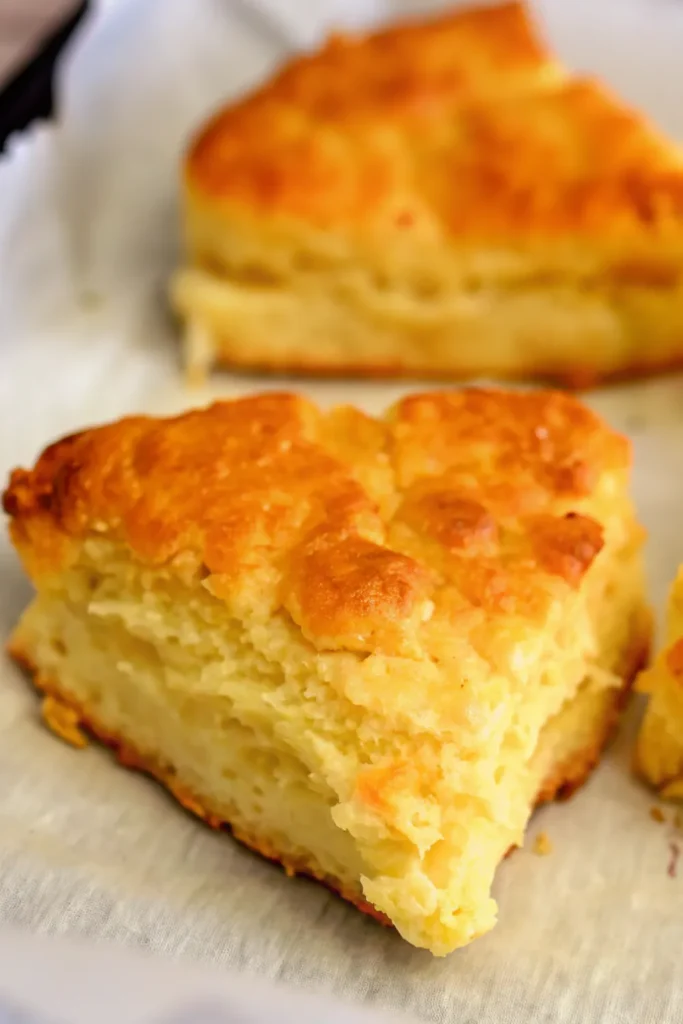
Cheese Scones Recipe (Extra Cheesy and Fluffy!)
This cheese scones recipe came straight out of one of those lazy Sunday mornings where I wanted something warm, savory, and totally satisfying. But I didn’t feel like pulling out a frying pan. You ever have that craving for something baked but not sweet? That’s where these scones came in. And let me tell you, they didn’t just hit the spot. They completely owned it.
Here’s the thing. Most people think of scones and go straight to strawberry jam and cream. Not me. Nope. I hear “scone” and I picture melty cheese, golden crusts, and those crisp, craggy edges that make you want to break one open before it’s even cooled. Honestly, I’ve been that person hovering near the oven waiting for them to be just cool enough to grab.
The idea for this one started after I noticed more and more bakeries popping up with savory scones here in Australia. It reminded me of the way savory muffins used to take over every coffee shop menu. And I thought to myself, why not bring that into my own kitchen?
WHY YOU WILL LOVE THIS RECIPE
- Extra cheesy in the best way – Most cheese scone recipes play it safe, but this one goes all in. I use a high cheese-to-flour ratio so you actually taste the cheese in every bite. No bland dough here pretending to be savory.
- Fluffy inside, crisp outside – The contrast is everything. You get that soft, airy interior that pulls apart like a dream, with golden, crunchy edges that give just the right amount of bite. It’s texture perfection.
- No cutters, no stress – You don’t need special tools or even much baking experience. Just pat the dough into a round, slice it like a pizza, and bake. It’s rustic, easy, and honestly way more fun this way.
- Endless add-in options – Once you’ve nailed the base, you can riff on it endlessly. Think green onions, sun-dried tomatoes, chopped olives, even a little kick from jalapeños. It’s your playground.
- Fast enough for weekdays – These come together in about 30 minutes, start to finish. That means you can whip them up before brunch, with soup, or even just because you’re bored on a Tuesday. No long prep, no chilling, no hassle.
- Satisfies every craving – Whether you want something savory with your morning coffee or a warm afternoon snack that feels like a hug, these scones deliver. They’re cozy, comforting, and just cheesy enough to be a little indulgent.
INGREDIENTS FOR CHEESE SCONES
Dry ingredients
- 1 ¾ cups (260g) plain flour (all-purpose flour)
- 1 tablespoon baking powder
- ½ teaspoon kosher or cooking salt
(Use ¼ teaspoon if using fine table salt, or ¾ teaspoon for sea salt flakes.)
Dairy
- 200g (about 2 cups) shredded cheese
(Cheddar, tasty, or another flavorful melting cheese. Avoid mozzarella.) - 80g (5 ½ tablespoons) cold unsalted butter, cut into small cubes
- ¾ cup (180ml) full-fat milk, plus extra for brushing
Optional add-ins
- 2 tablespoons chopped green onions
- 2 tablespoons chopped sun-dried tomatoes
- 2 tablespoons chopped olives or pickled jalapeños
- 2 tablespoons chopped cooked smoked turkey or beef bacon
STEP-BY-STEP INSTRUCTIONS
- STEP 1). Preheat your oven to 200°C (390°F) or 180°C if using a fan-forced setting. Line a baking tray with parchment paper.
- STEP 2). In a food processor, combine the flour, baking powder, and salt. Pulse once or twice to mix.
- STEP 3). Add the cold butter cubes. Pulse 4 to 5 times until the butter is broken down into small pieces about the size of peas.
- STEP 4). Add the shredded cheese and any optional mix-ins. Pulse briefly just to combine.
- STEP 5). While pulsing, slowly pour in the milk through the feeder tube. Stop once the dough comes together and there’s no visible dry flour. It should be slightly sticky.
- STEP 6). Turn the dough out onto a sheet of parchment paper. Shape it into a round disc about 3cm (1.2 inches) thick.
- STEP 7). Brush the top of the dough with a little extra milk. Sprinkle with a small handful of cheese, if you like a cheesy crust. Use a knife to cut the disc into 6 even wedges.
- STEP 8). Transfer the wedges to the lined tray, spacing them about 5cm (2 inches) apart.
- STEP 9). Bake for 20 minutes, or until the tops are golden and the edges look crisp.
- STEP 10). Let the scones cool on the tray for 5 minutes, then serve warm.
EXPERT COOKING TIPS FOR CHEESE SCONES
- Use cold butter straight from the fridge. This is what helps create flaky pockets in the dough as it bakes. If the butter softens too much before baking, the scones won’t rise properly.
- Pulse gently, don’t blend. When using a food processor, pulse just enough to break down the butter and mix the cheese through. Overprocessing can turn the dough gummy.
- Stick with a sharp cheese. Milder cheeses won’t shine through once baked. A sharp cheddar or aged tasty cheese gives you that rich, savory kick you’re after.
- Don’t skip spacing the wedges. Give each scone room on the tray so the sides crisp up nicely. Too close together and they’ll steam instead of bake.
- Serve them warm. These scones are at their best fresh out of the oven, with the cheese still melty and the crust crisp. If reheating, use a quick microwave zap to bring them back to life.
RECIPE FAQ
What kind of cheese works best?
I love a sharp cheddar or a tasty cheese blend. You want something with real flavor that holds up in the oven. Avoid mozzarella or anything too mild — it won’t give you that punchy cheesy taste.
How do I store leftovers?
Let them cool completely, then pop them in an airtight container. They’ll keep for 2 to 3 days at room temp. When you’re ready to eat, microwave them for about 30 seconds to bring back the fluffiness.
Can I freeze the scones?
Yep, they freeze great. Just wrap them individually and store in a freezer bag. Reheat straight from frozen in the microwave or let them thaw at room temp before warming.
SERVING IDEAS FOR CHEESE SCONES
Cheese scones are incredibly versatile, so don’t box them into just one mealtime. I’ve had them for breakfast with scrambled eggs, as a side with soup, and even just on their own with a bit of butter and a cup of tea.
One of my favorite ways to serve them is warm from the oven with a little pat of salted butter melting into the crumb. That combo of fluffy inside and melty cheese is unbeatable.
If you’re making a brunch spread, these scones hold their own next to quiches, frittatas, or roasted veggies. And if you’re feeling bold? Slice one open and use it as the base for a breakfast sandwich — egg, spinach, maybe even a little avocado.
Whether you’re feeding guests or just yourself, they make everything feel a little more special.
STORING & REHEATING TIPS
These scones are definitely at their peak fresh out of the oven, but that doesn’t mean they don’t hold up later. If you’ve got leftovers (or you’re just planning ahead), storing them properly makes all the difference.
Once they’ve cooled completely, pop them into an airtight container. They’ll stay good at room temperature for 2 to 3 days. If your kitchen’s warm, you might want to store them in the fridge — just bring them to room temp or warm them before eating.
To reheat, a quick 30-second blast in the microwave brings the fluffiness right back. If you prefer a crispier texture, you can pop them in the oven at 180°C (350°F) for about 5 minutes instead.
And yes, they freeze well too. Wrap each one individually and stash them in a freezer-safe bag. When the craving hits, reheat straight from frozen in the microwave or give them a few extra minutes in the oven.
And hey, before we wrap things up, there’s just one more thing I want to say.
If you’ve never had a savory scone before, this is the one to start with. It’s cheesy, warm, and totally comforting — everything you want from a homemade bake without any of the fuss. You don’t need special skills or tools, just a craving and half an hour.
So go on, give them a try. And when you do, don’t be surprised if they become a regular in your kitchen. They sure did in mine.
Cheese Scones Recipe (Extra Cheesy and Fluffy!)
Ingredients
Dry ingredients
- 1 ¾ cups (260g) plain flour (all-purpose flour)
- 1 tablespoon baking powder
- ½ teaspoon kosher or cooking salt (Use ¼ teaspoon if using fine table salt, or ¾ teaspoon for sea salt flakes.)
Dairy
- 200g (about 2 cups) shredded cheese (Cheddar, tasty, or another flavorful melting cheese. Avoid mozzarella.)
- 80g (5 ½ tablespoons) cold unsalted butter, cut into small cubes
- ¾ cup (180ml) full-fat milk, plus extra for brushing
Optional add-ins
- 2 tablespoons chopped green onions
- 2 tablespoons chopped sun-dried tomatoes
- 2 tablespoons chopped olives or pickled jalapeños
- 2 tablespoons chopped cooked smoked turkey or beef bacon
Instructions
- Preheat your oven to 200°C (390°F) or 180°C if using a fan-forced setting. Line a baking tray with parchment paper.
- In a food processor, combine the flour, baking powder, and salt. Pulse once or twice to mix.
- Add the cold butter cubes. Pulse 4 to 5 times until the butter is broken down into small pieces about the size of peas.
- Add the shredded cheese and any optional mix-ins. Pulse briefly just to combine.
- While pulsing, slowly pour in the milk through the feeder tube. Stop once the dough comes together and there’s no visible dry flour. It should be slightly sticky.
- Turn the dough out onto a sheet of parchment paper. Shape it into a round disc about 3cm (1.2 inches) thick.
- Brush the top of the dough with a little extra milk. Sprinkle with a small handful of cheese, if you like a cheesy crust. Use a knife to cut the disc into 6 even wedges.
- Transfer the wedges to the lined tray, spacing them about 5cm (2 inches) apart.
- Bake for 20 minutes, or until the tops are golden and the edges look crisp.
- Let the scones cool on the tray for 5 minutes, then serve warm.


