Moist Marble Cake Recipe: Soft, Fluffy, and Delicious
This Moist Marble Cake Recipe is seriously one of my all-time favorite bakes! You know, I’ve always had this soft spot for marble cakes. There’s just something so cool about swirling two flavors together and watching them turn into something so pretty and delicious. But here’s the thing, I used to think marble cakes were kinda complicated. Like maybe they’re only for those fancy bakers with perfect kitchens and a hundred different mixing bowls.
Nope. Totally wrong.
The first time I made this, I was like, wait, that’s it? That’s all it takes? I was just standing there, looking at my batter, swirling it around with a butter knife, feeling like I’d just painted a masterpiece. And the best part? It came out super soft, fluffy, and oh so moist. Honestly, I couldn’t stop sneaking little pieces while waiting for it to cool.
You’re gonna love this one. It’s easy, it’s fun, and it’s one of those cakes that makes people go, “Wow, you made that?” I’ve had so many trial and error moments in the kitchen, but this one just clicked right from the start. I can’t wait to walk you through it like we’re baking together in my kitchen.
Ready to make the fluffiest, yummiest marble cake ever? Let’s do this!
WHY YOU WILL LOVE THIS RECIPE
- Super soft texture – every bite is melt-in-your-mouth fluffy.
- Easy method – no complicated steps, just simple mixing and swirling.
- Fun to make – I felt like an artist swirling the batter, and you will too.
- Rich chocolate flavor – that chocolate layer? It’s bold and totally satisfying.
- Customizable flavors – you can swap in strawberry, matcha, or any flavor you love.
- Perfect for sharing – it’s a crowd-pleaser that always gets those “wow” reactions.

INGREDIENTS
Dry ingredients
- 1 cup (128 grams) all-purpose white flour
- 1 teaspoon baking powder
- Pinch of salt
- 1/2 cup + 2 tablespoons (125 grams) granulated sugar
Wet ingredients
- 15 tablespoons aquafaba (the liquid from canned chickpeas)
- 1 teaspoon alcohol-free vanilla flavoring
- 1 stick (113 grams) vegan butter, melted
Chocolate layers
- 4.4 oz (125 grams) vegan dark chocolate (make sure it’s dairy-free)
- 4.4 oz (125 grams) vegan white chocolate (if you can’t find it, you can skip it)
For the cake pan
- A bit of vegan butter (just enough to grease the pan)
- Parchment paper
STEP BY STEP INSTRUCTIONS
STEP 1) I start by grabbing my egg beater and whipping the aquafaba with the sugar until it looks super fluffy and almost doubles in size. It’s kinda wild how it gets thick and shiny, and when I drizzle some off the spoon, it folds over itself like a pretty little ribbon. That’s how I know I’ve nailed it.
STEP 2) I toss in the alcohol-free vanilla flavoring, the baking powder, and a small pinch of salt. I give it a quick mix to pull everything together. This step is fast but super important to get the flavors blended.
STEP 3) While that’s working, I melt my vegan butter. Sometimes I microwave it because, honestly, I’m not in the mood to wash extra pans. I pour the melted butter into the fluffy aquafaba mix while stirring, making sure it’s all mixed smoothly. I’m not rushing here. I stir gently to keep that lovely airiness.
STEP 4) I sift the flour right over the wet mix. No lumps allowed. I carefully fold everything together with my spatula like I’m wrapping a soft blanket. No smashing, just sweet little folds to keep it light and fluffy.
STEP 5) I split the batter into two bowls. In one, I stir in the melted vegan dark chocolate. In the other, I mix in the melted vegan white chocolate. Sometimes I get playful and swap flavors like strawberry or green tea. You know what? It’s your cake, go wild with it.
STEP 6) I preheat the oven to 360°F (180°C). I grease my cake pan with a little vegan butter and line it with parchment paper. I always press the paper down so it sticks properly and cut it nice and neat to fit the pan. Trust me, this saves you from a sticking disaster later.
STEP 7) I pour half of the white chocolate batter into the pan and spread it out. Then I layer all the dark chocolate batter on top and spread it gently. Finally, I pour the rest of the white chocolate batter over it. It doesn’t need to look perfect. It’s all gonna swirl anyway.
STEP 8) Now for the fun part. I grab a butter knife and swirl it through the batter like I’m doodling in a notebook. Big loops, little circles, I just have fun with it. There’s no right way to do this. Just swirl until you love the look.
STEP 9) I slide the cake into the oven and bake it for about 45 minutes. I don’t open the oven door too early. I learned that the hard way. When it turns golden on top and feels firm when I press it gently, I know it’s ready.
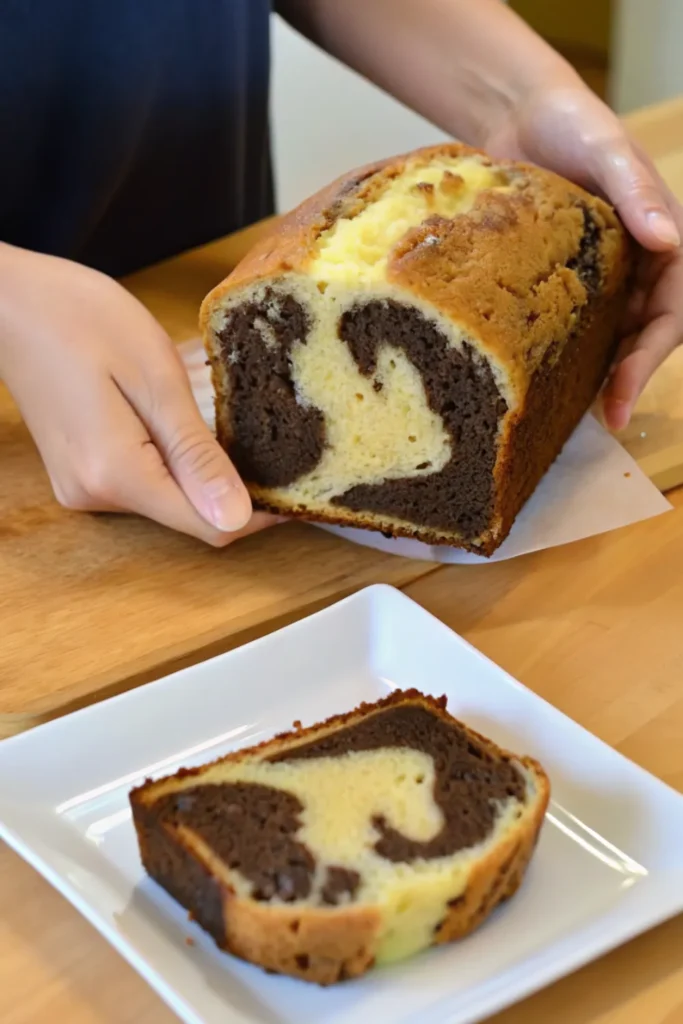
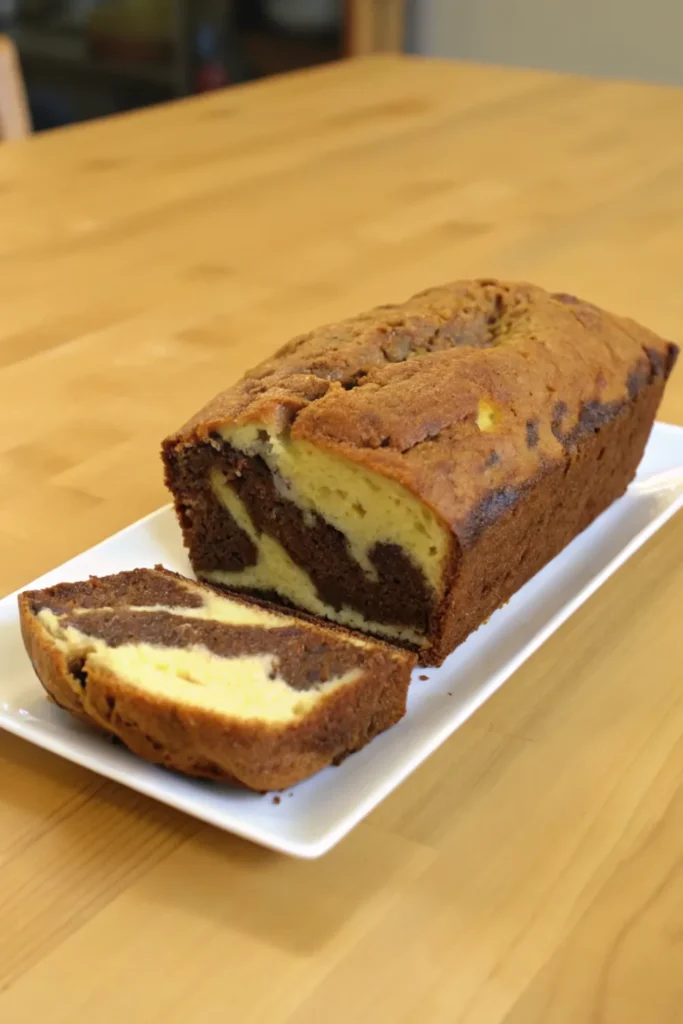
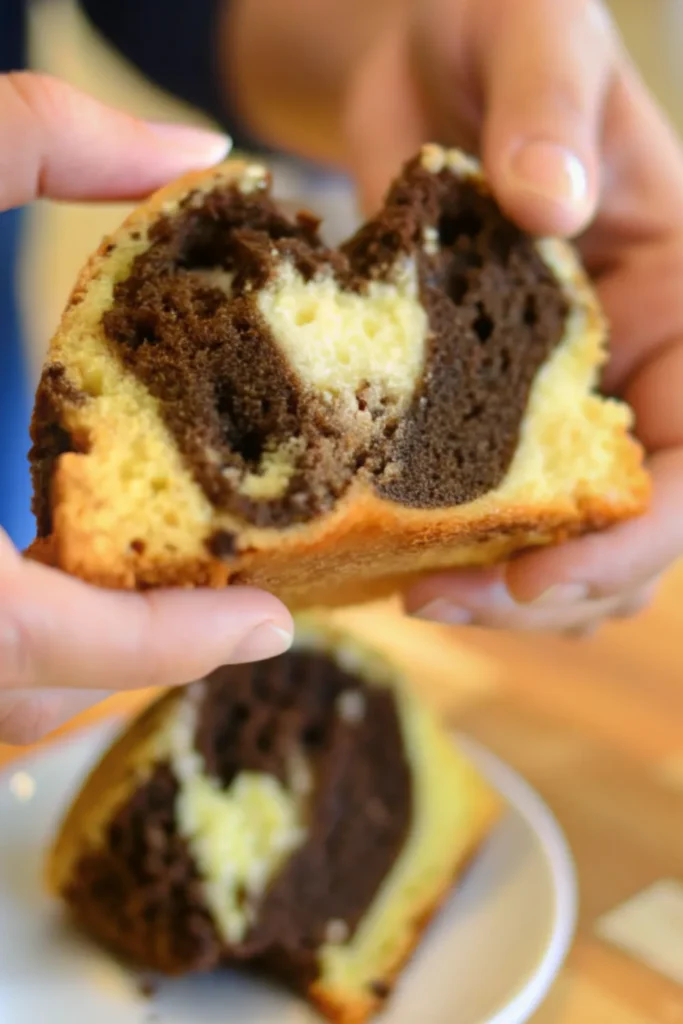
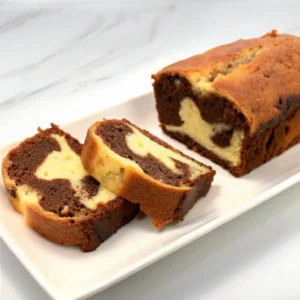
STEP 10) I let the cake cool down in the pan a bit before taking it out. I know waiting is hard because the smell is incredible, but patience is key here. Once it’s cool, I slice into the soft, fluffy layers, and seriously, it’s everything I wanted in a marble cake.
EXPERT COOKING TIPS
- Whip the aquafaba really well – don’t rush this part. The longer you whip, the fluffier your cake will be. I used to stop too early, and my cake turned out kinda flat. You want those shiny ribbons.
- Fold gently – when you add the flour, don’t smash it in. I used to stir like I was in a race, but nope, that kills the fluff. Just fold like you’re wrapping a gift.
- Use good-quality chocolate – I learned the hard way that cheap chocolate doesn’t melt well and can make the batter lumpy. Go for the smooth, dairy-free stuff.
- Don’t over-swirl – I used to think more swirls meant prettier cake, but too much mixing blends the layers together and ruins the marble effect. Just a few gentle swirls do the trick.
- Let it cool properly – I know it’s tempting to cut into it right away, but if you let it cool, the texture holds better, and the flavors come through. I’ve rushed this before and ended up with a crumbly mess.
RECIPE FAQ
What if I don’t have aquafaba?
No worries, you can use unsweetened applesauce instead. About 1 and 1/4 cups will work just fine. It won’t give you the same fluff as aquafaba, but it still makes a soft and moist cake.
How do I know when the cake is done?
I press the top gently, and if it feels firm and bounces back, it’s good to go. You can also stick a toothpick in the middle. If it comes out clean, you’re golden.
Can I freeze this marble cake?
Oh, for sure! I’ve wrapped slices in parchment paper and popped them in the freezer plenty of times. Just let them thaw at room temp when you’re ready to enjoy. It’s a lifesaver when I need a quick sweet fix.
VEGAN & ALLERGY-FRIENDLY SWAPS
- Aquafaba swap – you can use 1 and 1/4 cups of unsweetened applesauce if you don’t have aquafaba on hand. It won’t whip the same, but the cake will still come out soft.
- Vegan butter swap – if you’re out of vegan butter, a neutral oil like sunflower oil or light olive oil works just fine. I’ve tried both, and they keep the cake moist.
- White chocolate swap – if you can’t find vegan white chocolate, just skip it or replace it with another flavor like strawberry puree or matcha powder.
- Gluten-free option – you can use a gluten-free all-purpose flour blend. I’ve tested this with a good 1:1 gluten-free mix, and it holds up pretty well.
- Sugar swap – if you need to avoid refined sugar, coconut sugar or another granulated sweetener can work. Just keep in mind the color of the cake will be a little darker.
This Moist Marble Cake Recipe has become one of my go-to desserts when I want something soft, fluffy, and just plain fun to make. I love how simple the steps are and how the cake always comes out looking like a little work of art. The mix of rich chocolate and light vanilla flavors makes every bite feel special. Honestly, it’s one of those recipes I keep coming back to because it never disappoints. I hope you enjoy baking it as much as I do!
Moist Marble Cake Recipe: Soft, Fluffy, and Delicious
Ingredients
Dry ingredients
- 1 cup (128 grams) all-purpose white flour
- 1 teaspoon baking powder
- Pinch of salt
- 1/2 cup + 2 tablespoons (125 grams) granulated sugar
Wet ingredients
- 15 tablespoons aquafaba (the liquid from canned chickpeas)
- 1 teaspoon alcohol-free vanilla flavoring
- 1 stick (113 grams) vegan butter, melted
Chocolate layers
- 4.4 oz (125 grams) vegan dark chocolate (make sure it’s dairy-free)
- 4.4 oz (125 grams) vegan white chocolate (if you can’t find it, you can skip it)
For the cake pan
- A bit of vegan butter (just enough to grease the pan)
- Parchment paper
Instructions
- I start by grabbing my egg beater and whipping the aquafaba with the sugar until it looks super fluffy and almost doubles in size. It’s kinda wild how it gets thick and shiny, and when I drizzle some off the spoon, it folds over itself like a pretty little ribbon. That’s how I know I’ve nailed it.
- I toss in the alcohol-free vanilla flavoring, the baking powder, and a small pinch of salt. I give it a quick mix to pull everything together. This step is fast but super important to get the flavors blended.
- While that’s working, I melt my vegan butter. Sometimes I microwave it because, honestly, I’m not in the mood to wash extra pans. I pour the melted butter into the fluffy aquafaba mix while stirring, making sure it’s all mixed smoothly. I’m not rushing here. I stir gently to keep that lovely airiness.
- I sift the flour right over the wet mix. No lumps allowed. I carefully fold everything together with my spatula like I’m wrapping a soft blanket. No smashing, just sweet little folds to keep it light and fluffy.
- I split the batter into two bowls. In one, I stir in the melted vegan dark chocolate. In the other, I mix in the melted vegan white chocolate. Sometimes I get playful and swap flavors like strawberry or green tea. You know what? It’s your cake, go wild with it.
- I preheat the oven to 360°F (180°C). I grease my cake pan with a little vegan butter and line it with parchment paper. I always press the paper down so it sticks properly and cut it nice and neat to fit the pan. Trust me, this saves you from a sticking disaster later.
- I pour half of the white chocolate batter into the pan and spread it out. Then I layer all the dark chocolate batter on top and spread it gently. Finally, I pour the rest of the white chocolate batter over it. It doesn’t need to look perfect. It’s all gonna swirl anyway.
- Now for the fun part. I grab a butter knife and swirl it through the batter like I’m doodling in a notebook. Big loops, little circles, I just have fun with it. There’s no right way to do this. Just swirl until you love the look.
- I slide the cake into the oven and bake it for about 45 minutes. I don’t open the oven door too early. I learned that the hard way. When it turns golden on top and feels firm when I press it gently, I know it’s ready.
- I let the cake cool down in the pan a bit before taking it out. I know waiting is hard because the smell is incredible, but patience is key here. Once it’s cool, I slice into the soft, fluffy layers, and seriously, it’s everything I wanted in a marble cake.


